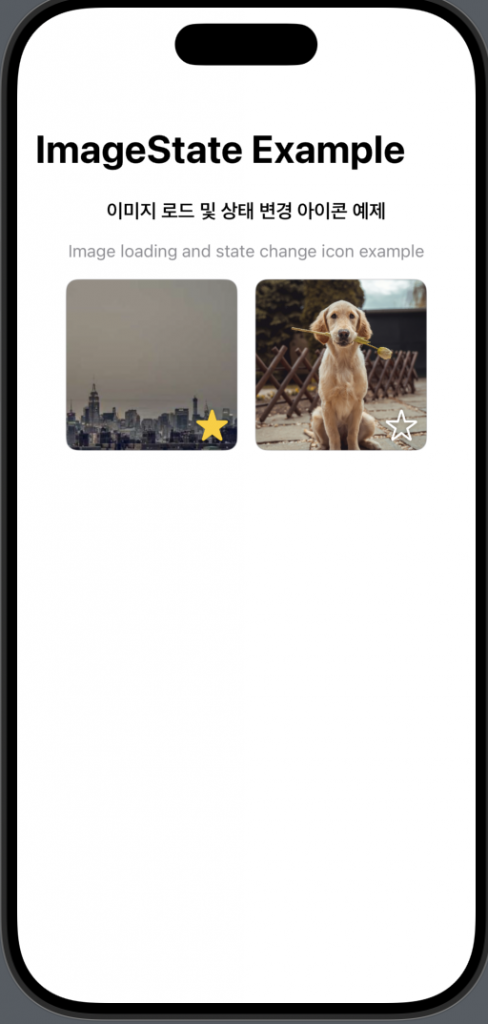
👉🏻 상태관리를 통해서 별 모양을 누르면 아이콘 모양이 바뀝니다.
When you click on the star shape through status management, the icon shape changes.
👉🏻 로컬 이미지와 네트워크 이미지를 사용합니다.
Use local and network images.
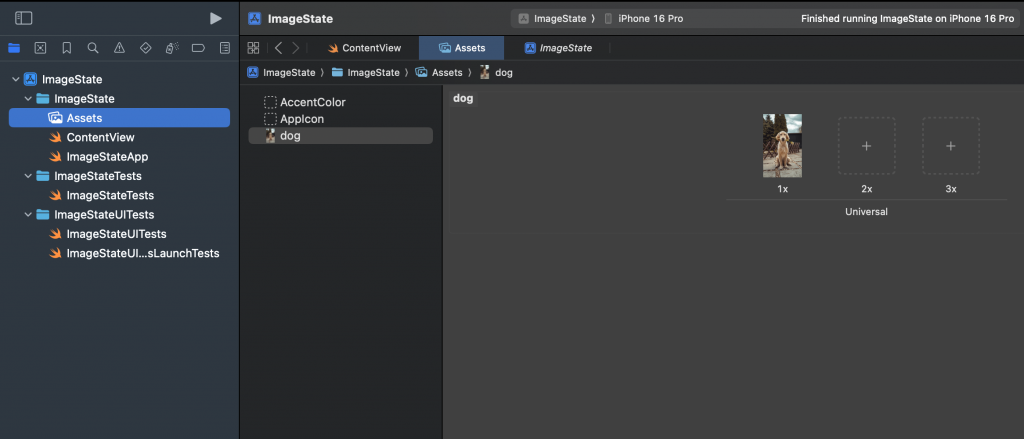
1.이미지 넣기 / Insert image
✔️Assets 디렉토리에 이미지를 끌어다 놓으면됩니다.
Just drag and drop the image into the Assets directory.
2.소스코드 / Source Code
// ContentView

import SwiftUI

// 네트워크 이미지 URL / Network image URL
let dummyImageUrl = URL(string: "https://picsum.photos/300/300")!

struct ContentView: View {
    var body: some View {
        NavigationView {
            VStack(spacing: 16) {
                Text("이미지 로드 및 상태 변경 아이콘 예제")
                    .font(.headline)
                    .frame(maxWidth: .infinity, alignment: .center)

                Text("Image loading and state change icon example")
                    .font(.subheadline)
                    .foregroundColor(.gray)
                    .frame(maxWidth: .infinity, alignment: .center)

                HStack(spacing: 16) {
                    // 네트워크 이미지 / Network image
                    ImageWithToggleIcon(
                        imageContent: {
                            AsyncImage(url: dummyImageUrl) { phase in
                                switch phase {
                                case .empty:
                                    ProgressView()
                                        .frame(maxWidth: .infinity, maxHeight: .infinity)
                                case .success(let image):
                                    image
                                        .resizable()
                                        .scaledToFill()
                                case .failure:
                                    Color.gray
                                        .overlay(Text("Error").foregroundColor(.white))
                                @unknown default:
                                    EmptyView()
                                }
                            }
                        }
                    )

                    // 로컬 이미지 / Local image
                    ImageWithToggleIcon(
                        imageContent: {
                            Image("dog")
                                .resizable()
                                .scaledToFill()
                        }
                    )
                }
                .frame(maxWidth: .infinity)
                Spacer()
            }
            .padding()
            .navigationTitle("ImageState Example")
        }
    }
}

// 개별 이미지 + 즐겨찾기 토글 아이콘
// Individual images + favorite toggle icon
struct ImageWithToggleIcon<Content: View>: View {
    @State private var isFavorite = false
    let imageContent: () -> Content

    var body: some View {
        ZStack(alignment: .bottomTrailing) {
            imageContent()
                .frame(width: 150, height: 150)
                .clipped()
                .cornerRadius(10)
                .overlay(
                    RoundedRectangle(cornerRadius: 10)
                        .stroke(Color.gray.opacity(0.3), lineWidth: 1)
                )

            // 클릭 시 토글되는 아이콘 / Icon that toggles when clicked
            Image(systemName: isFavorite ? "star.fill" : "star")
                .resizable()
                .frame(width: 28, height: 28)
                .foregroundColor(isFavorite ? .yellow : .white)
                .shadow(radius: 2)
                .padding(8)
                .onTapGesture {
                    withAnimation(.spring()) {
                        isFavorite.toggle()
                    }
                }
        }
        .frame(width: 150, height: 150)
    }
}

#Preview {
    ContentView()
}
3.스크린샷 / ScreenShot