⭐️ MacOS에서 테스트했지만 다른 운영체제에서도 실행할 수 있습니다.
Tested on macOS, but should run on other operating systems as well.
👉🏻 1. 프로젝트 구조 설정 / Set up project structure
✔️ 먼저 전체를 관리할 루트 폴더 안에 클라이언트와 서버 폴더를 나눕니다.
First, divide the client and server folders into the root folder that will manage the whole thing.
ReactExample5/
├── client/ (Vite + React)
└── server/ (Express)
👉🏻 2. Express 서버 설정 / Express Server Setup (Backend)
✔️ server/ 폴더에서 Express를 설치하고 간단한 API를 만듭니다.
Install Express in the server/ folder and create a simple API.
cd server
npm init -y
npm install express
✔️ package.json
{
  "name": "server",
  "version": "1.0.0",
  "description": "",
  "main": "index.js",
  "scripts": {
    "test": "echo \"Error: no test specified\" && exit 1"
  },
  "keywords": [],
  "author": "",
  "license": "ISC",
  "type": "commonjs",
  "dependencies": {
    "express": "^5.2.1"
  }
}
✔️ server/index.js
const express = require('express');
const app = express();
const PORT = 3000;

app.get('/api/data', (req, res) => {
  res.json({ message: "Hello from Express Server!" });
});

app.listen(PORT, () => {
  console.log(`Server is running on http://localhost:${PORT}`);
});
👉🏻3. Vite + React프로젝트 설치 및 설정 / Installing and Setting Up a Vite + React Project
✔️ 프로젝트 설치 / Project installation
% npm create vite@latest client --template react-ts✔️ client/ 폴더에서 Vite 프로젝트를 생성하고, 프록시 설정을 추가합니다. 이 설정이 핵심입니다.
Create a Vite project in the client/ folder and add proxy settings. These settings are key.
✔️ client/vite.config.js
import { defineConfig } from 'vite'
import react from '@vitejs/plugin-react'

export default defineConfig({
  plugins: [react()],
  server: {
    proxy: {
      // '/api'로 시작하는 요청을 백엔드 서버로 보냅니다.
      // Send requests starting with '/api' to the backend server.
      '/api': {
        target: 'http://localhost:3000',
        changeOrigin: true,
      }
    }
  }
})
👉🏻 4. React에서 API 호출하기 / Calling APIs in React
✔️ 이제 프록시 설정을 마쳤으므로, React에서는 전체 URL(http://localhost:3000/...)을 적을 필요 없이 상대 경로만 적으면 됩니다.
Now that we’ve set up our proxy settings, we can just write the relative path in React instead of the full URL (http://localhost:3000/…).
✔️ client/src/App.jsx
— useEffect() :
컴포넌트가 브라우저 화면에 처음 나타날 때(Mount) 딱 한 번만 실행합니다.
It runs exactly once when the component first appears on the browser screen (Mount).
— .then((data) => setMessage(data.message)) :
data라는 덩어리 안에서 ‘message’라는 이름표가 붙은 값만 가져올게”라는 뜻입니다.
It means I’ll just take the value labeled ‘message’ from the data object.
import { useEffect, useState } from "react";
import "./AppStyle.css";

function App() {
  const [message, setMessage] = useState("");

  useEffect(() => {
    // 프록시 설정 덕분에 /api/... 로 바로 호출 가능
    // Direct call to /api/... is possible due to proxy settings
    fetch("/api/data")
      .then((res) => res.json())
      .then((data) => setMessage(data.message))
      .catch((err) => console.error(err));
  }, []);

  return (
    <div className="container">
      <h3>Vite + Express 연동 테스트 / Link test</h3>
      <p>서버메세지/Server Message: {message}</p>
    </div>
  );
}

export default App;
✔️ client/src/AppStyle.css
👉🏻5. 실행 방법 / How to run
두 서버를 동시에 띄워야 합니다. 각각의 터미널에서 다음 명령어를 입력하세요.
You need to launch both servers simultaneously. Enter the following commands in each terminal:
- Backend:
cd server && node index.js - Frontend:
cd client && npm run dev
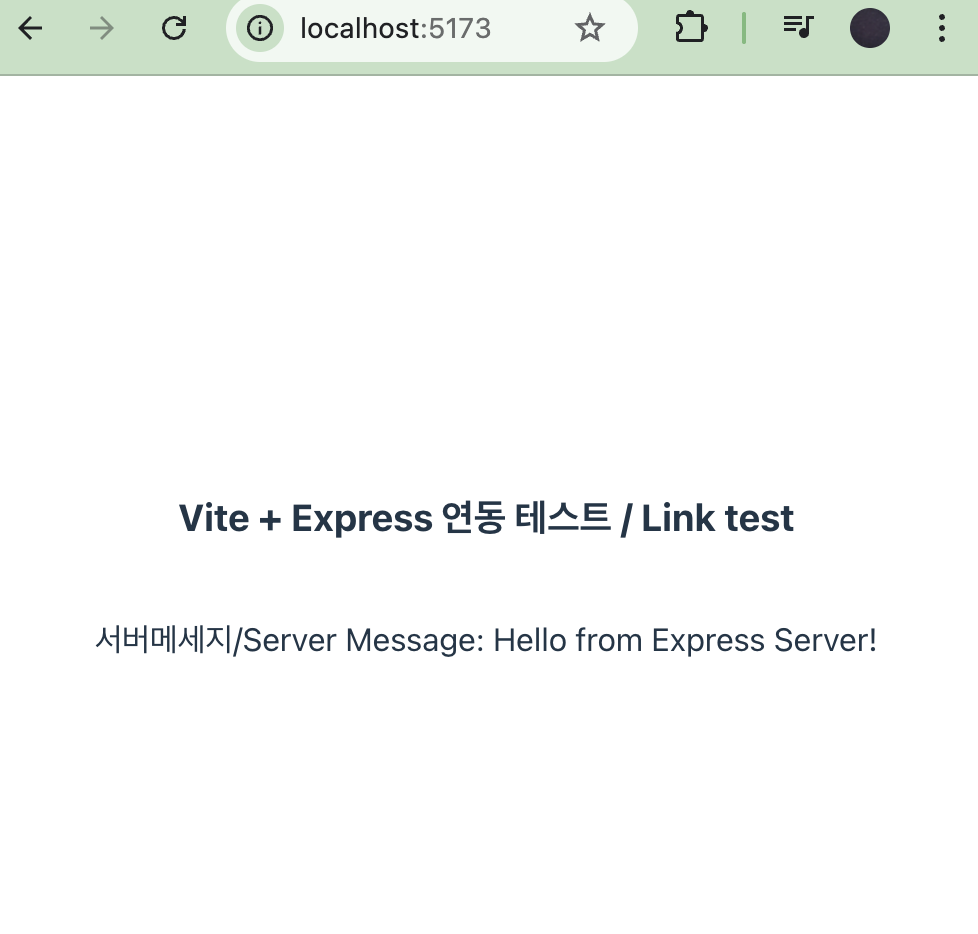
👉🏻 6. 스크린 샷 / ScreenShot
✔️ 브라우저에서 http://localhost:5173을 실행합니다.
Go to http://localhost:5173 in your browser.