구글드라이브/Google Drive : https://drive.google.com/drive/folders/1DR4lNIQUgMdkizV_Uy-tzQLI917B1Fmd?usp=drive_link
※이 앱은 별도이 보안설정 없이 동작합니다. 하지만 연결 문제가 생길 경우 로그인 포스트의 설정 부분을 참조 하세요
This app works without any separate security settings. However, if you have connection problems, please refer to the settings section of the login post.
1.signup폴더 / signup folder
– 리액트네이티브앱 폴더 입니다.
This is the react native app folder.
-index.js파일을 열고 다음 처럼 코드를 수정 합니다.
Open the index.js file and modify the code as follows.
/**
 * @format
 */

import {AppRegistry} from 'react-native';
import App from './src/index';
import {name as appName} from './app.json';

AppRegistry.registerComponent(appName, () => App);
– package.json파일을 열어 보시고 signup폴더 내에서 npm install “module name” 명령으로 아래의 모듈 설치 하시면 됩니다.
Open the package.json file and install the module below with the npm install “module name” command in the signup folder.
– package.json파일은 모듈을 설치 하면 자동적으로 만들어지지만 자동 생성되지 않을 경우npm init명령으로 생성 할 수 있습니다.
The package.json file is automatically created when you install a module, but if it is not automatically created, you can create it with the npm init command.
{
  "name": "signup",
  "version": "0.0.1",
  "private": true,
  "scripts": {
    "android": "react-native run-android",
    "ios": "react-native run-ios",
    "lint": "eslint .",
    "start": "react-native start",
    "test": "jest"
  },
  "dependencies": {
    "@react-navigation/stack": "^7.2.10",
    "react": "19.0.0",
    "react-native": "0.79.1",
    "react-native-calendars": "^1.1311.1",
    "react-native-gesture-handler": "^2.25.0",
    "react-native-safe-area-context": "^5.4.0",
    "react-native-screens": "^4.10.0"
  },
  "devDependencies": {
    "@babel/core": "^7.25.2",
    "@babel/preset-env": "^7.25.3",
    "@babel/runtime": "^7.25.0",
    "@react-native-community/cli": "18.0.0",
    "@react-native-community/cli-platform-android": "18.0.0",
    "@react-native-community/cli-platform-ios": "18.0.0",
    "@react-native/babel-preset": "0.79.1",
    "@react-native/eslint-config": "0.79.1",
    "@react-native/metro-config": "0.79.1",
    "@react-native/typescript-config": "0.79.1",
    "@types/jest": "^29.5.13",
    "@types/react": "^19.0.0",
    "@types/react-test-renderer": "^19.0.0",
    "eslint": "^8.19.0",
    "jest": "^29.6.3",
    "prettier": "2.8.8",
    "react-test-renderer": "19.0.0",
    "typescript": "5.0.4"
  },
  "engines": {
    "node": ">=18"
  }
}
– npm run android 또는 npm run ios명령으로 앱을 실행 할 수 있습니다.
You can run the app with the npm run android or npm run ios command.
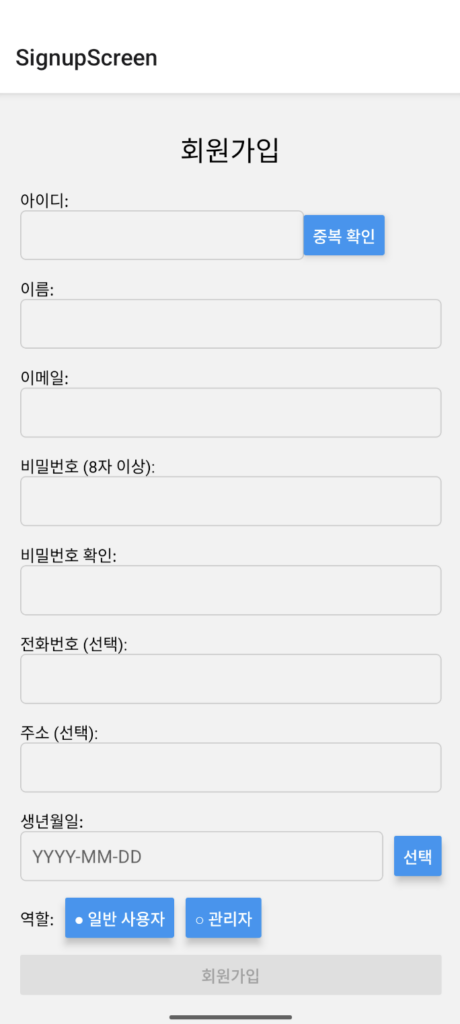
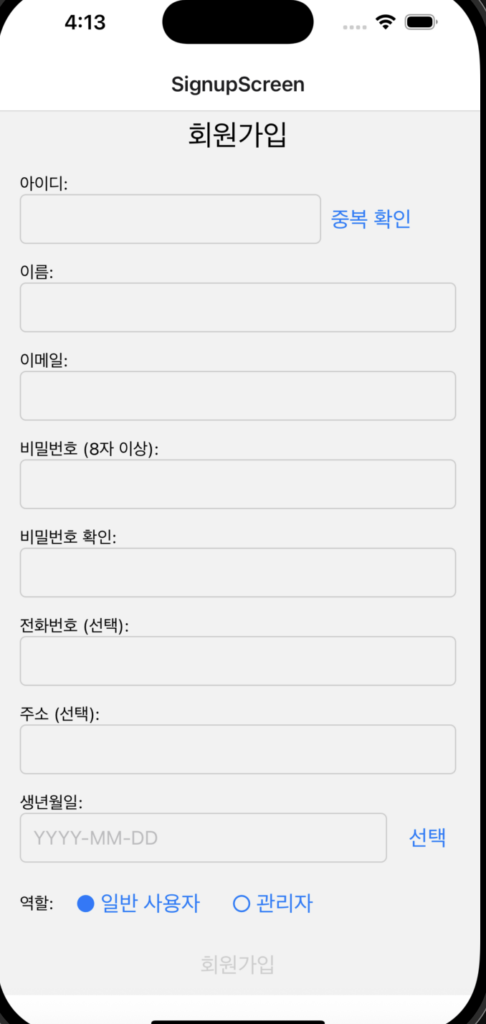
– 앱을 실행하면 다음과 같은 화면을 볼 수 있습니다.
When you run the app, you will see a screen like this.
– 에뮬레이터에서 실행한 화면으로 오른쪽은 ios왼쪽은 안드로이드 화면입니다.
The screen running on the emulator is iOS on the right and Android on the left.
2.nodeSignup폴더 : nodejs서버입니다. / nodeSignup folder: This is the nodejs server.
-nodeSignup폴더로 이동 후 package.json파일을 열고 모듈을 설치 합니다.
Go to the nodeSignup folder, open the package.json file, and install the module.
-여기는 모듈이 express하나 밖에 없습니다. 그래서 npm install express 이렇게 설치 하시면 됩니다.
There is only one module here, express. So, you can install it like this: npm install express.
{
  "name": "signup",
  "version": "1.0.0",
  "description": "signup for reactnative app",
  "main": "index.js",
  "scripts": {
    "test": "echo \"Error: no test specified\" && exit 1"
  },
  "author": "daekyeong kim",
  "license": "MIT",
  "dependencies": {
    "express": "^5.1.0"
  }
}
3.서버실행 / Run server
– node server.js start 명령으로 서버를 실행 합니다.
Run the server with the node server.js start command.
-그러면 아래와 같은 메세지가 보이면 정상입니다.
If you see a message like the one below, it is normal.
Express 서버가 http://localhost:3000 에서 실행 중입니다.4.앱과 서버 연동 / App and server integration
– singnup/src/SignupScreen.js파일 41번째 라인에서 192.168.0.10:3000을 여러분 아이피 주소로 변경합니다.
In line 41 of the SignupScreen.js file, change 192.168.0.10:3000 to your IP address.
const response = await fetch(`http://192.168.0.10:3000/checkUsername?username=${encodeURIComponent(username)}`);– 앱을 실행 후 정보를 입력하고 전송하면 서버에 다음과 같이 전송된 데이터 메세지가 보이면 정상 입니다.
After running the app, entering the information and sending it, if you see the following data message sent to the server, it is normal.

