👉🏻 ESP32는 블루투스를 사용이 가능합니다.
The ESP32 can use Bluetooth.
👉🏻 아래는 간단히 블루투스 연결을 하고 폰에서 메세지를 보내면 ESP32에서 메세지를 수신하고 폰에서 알림(hello from ESP32)받는 기능 구현을 위한 설명입니다.
The following is an explanation for implementing a feature where you simply establish a Bluetooth connection, send a message from a phone, the ESP32 receives the message, and the phone receives a notification (hello from ESP32).
👉🏻 기존의 ESP32보드 외에 메세지 전송을 위해 nRF Connect 앱을 다운 받습니다.
Download the nRF Connect app to send messages in addition to the existing ESP32 board.
👉🏻 IDE에서 업로드 속도(11520),모듈설정(Esp32 DevModule),포트설정(/dev/cu.usbserial-120 또는 140)은 동일합니다.
In the IDE, the upload speed (11520), module setting (Esp32 DevModule), and port setting (/dev/cu.usbserial-120 or 140) are the same.
👉🏻 아래의 순서대로 실행합니다.
Execute in the following order.
1)IDE에서 아래의 코드를 업로드 합니다.
Upload the code below in the IDE.
#include <BLEDevice.h>
#include <BLEServer.h>
#include <BLEUtils.h>
#include <BLE2902.h>

#define SERVICE_UUID        "6E400001-B5A3-F393-E0A9-E50E24DCCA9E"
#define CHARACTERISTIC_RX   "6E400002-B5A3-F393-E0A9-E50E24DCCA9E"
#define CHARACTERISTIC_TX   "6E400003-B5A3-F393-E0A9-E50E24DCCA9E"

BLECharacteristic *txChar;
bool deviceConnected = false;

class ServerCallbacks: public BLEServerCallbacks {
  void onConnect(BLEServer* pServer) { deviceConnected = true; }
  void onDisconnect(BLEServer* pServer) {
    deviceConnected = false;
    // 끊기면 다시 스캔에 보이게
    // If it is disconnected, it will be visible in the scan again.
    BLEDevice::startAdvertising();
  }
};

class RxCallbacks: public BLECharacteristicCallbacks {
  void onWrite(BLECharacteristic *pCharacteristic) {
    String value = pCharacteristic->getValue();
    if (value.length() > 0) {
      Serial.print("RX: ");
      Serial.println(value);
    }
  }
};

void setup() {
  Serial.begin(115200);

  BLEDevice::init("ESP32-BLE");
  BLEServer *pServer = BLEDevice::createServer();
  pServer->setCallbacks(new ServerCallbacks());

  BLEService *pService = pServer->createService(SERVICE_UUID);

  txChar = pService->createCharacteristic(
      CHARACTERISTIC_TX,
      BLECharacteristic::PROPERTY_NOTIFY
  );
  txChar->addDescriptor(new BLE2902());

  BLECharacteristic *rxChar = pService->createCharacteristic(
      CHARACTERISTIC_RX,
      BLECharacteristic::PROPERTY_WRITE
  );
  rxChar->setCallbacks(new RxCallbacks());

  pService->start();

  BLEAdvertising *pAdvertising = BLEDevice::getAdvertising();
  pAdvertising->addServiceUUID(SERVICE_UUID);
  pAdvertising->setScanResponse(true);
  // iOS/LightBlue 안정화에 도움
  pAdvertising->setMinPreferred(0x06);
  pAdvertising->setMinPreferred(0x12);

  BLEDevice::startAdvertising();
  Serial.println("BLE Ready. Connect with phone app.");
}

void loop() {
  if (deviceConnected) {
    txChar->setValue("hello from ESP32");
    txChar->notify();
    //Serial.println("TX sent"); // 시리얼 모니터에 출력하기/Output to Serial Monitor
    delay(1000);
  } else {
    delay(200);
  }
}
2)먼저 모바일 폰에서 블루투스 연결을 합니다.
First, connect via Bluetooth on your mobile phone.
3) nRF Connect앱에서 스캔을 실행해서 ESP32-BLE 우측에 Connect 버튼을 클릭합니다.
Run a scan in the nRF Connect app and click the Connect button to the right of ESP32-BLE.
✔️ 만약에 자동검색 되지 않으면 No filter 버튼을 클릭해서 돋보기 부분에 ESP를 검색어로 설정합니다.
If automatic search does not work, click the No filter button and set ESP as the search term in the magnifying glass section.
4) 접속이 완료되면 아래와 같은 화면이 실행됩니다.
Once the connection is complete, the following screen will appear.
✔️ 접속이 완료되면 Nordic UART Service를 탭합니다.
Once the connection is complete, tap Nordic UART Service.
5) 하단 메뉴가 나타나면 메세지 발송을 위해 RX Chracteristic 우측 버튼을 탭합니다.
When the bottom menu appears, tap the right button of RX Characteristic to send a message.
6) 창이 뜨면 메세지를 작성하고 SEND버튼을 눌러서 메세지를 발송합니다.
When the window pops up, compose a message and press the SEND button to send the message.
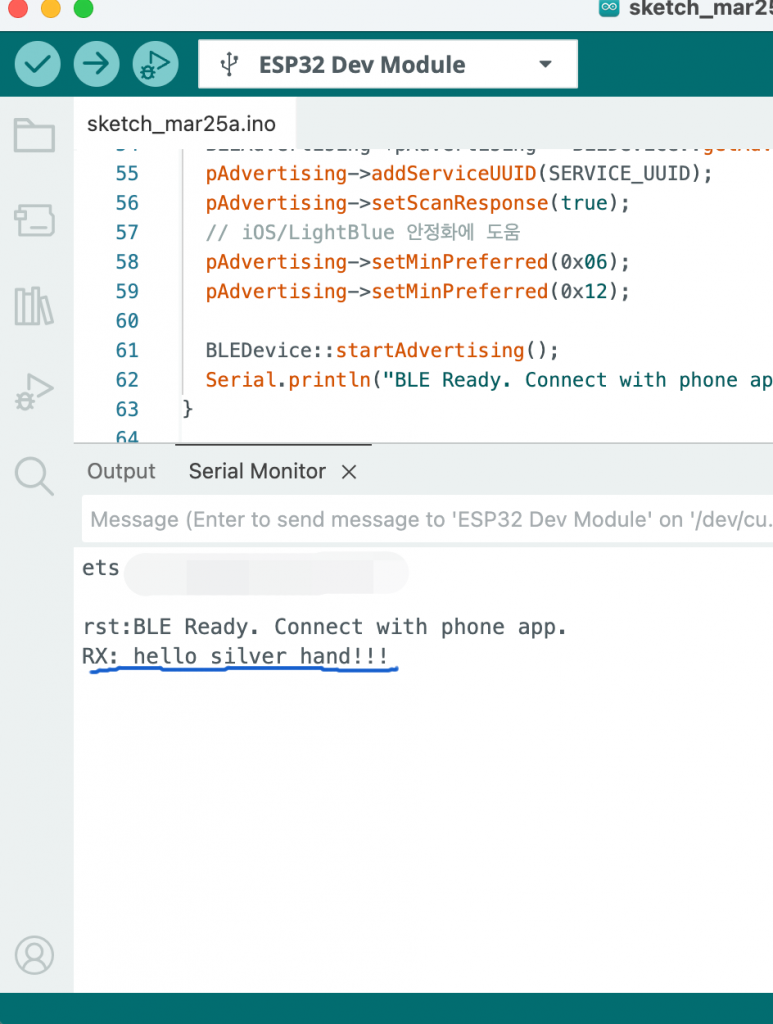
7) 아두이노 IDE에서 메세지가 전송됐는지 확인합니다.
Check in the Arduino IDE whether the message has been sent.