👉🏻 ESP32보드에 조도센서(TEMP6000)를 연결하고 테스트하는 설명입니다.
This is an explanation of connecting and testing a Illuminance sensor (TEMP6000) to an ESP32 board.
👉🏻 조도란 단위 면적당 표면에 도달하는 빛의 밝기를 나타내는 물리량을 의미합니다.
Illuminance refers to a physical quantity representing the brightness of light reaching a surface per unit area.
👉🏻 즉 TEMT600은 주위환경의 밝기를 측정하는 센서입니다.
In other words, the TEMT600 is a sensor that measures the brightness of the surrounding environment.
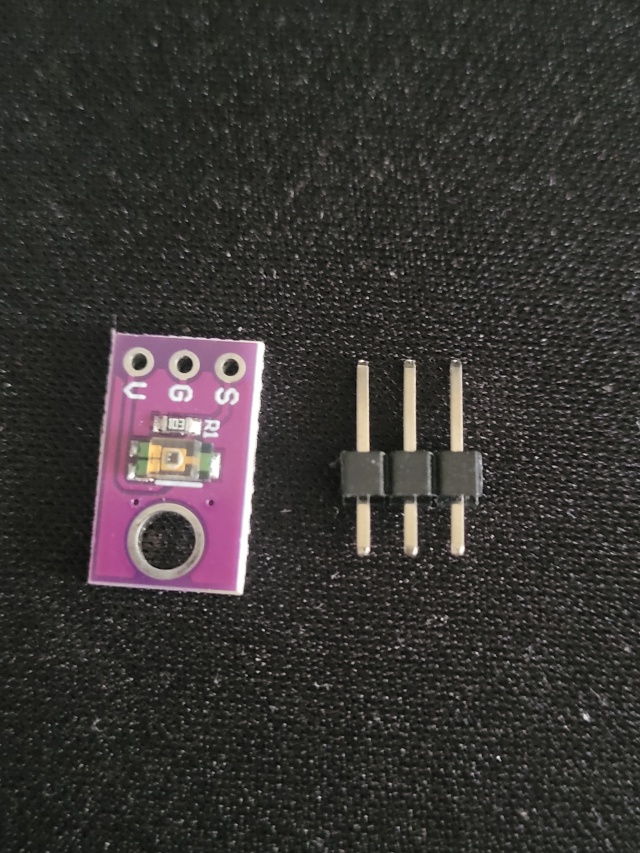
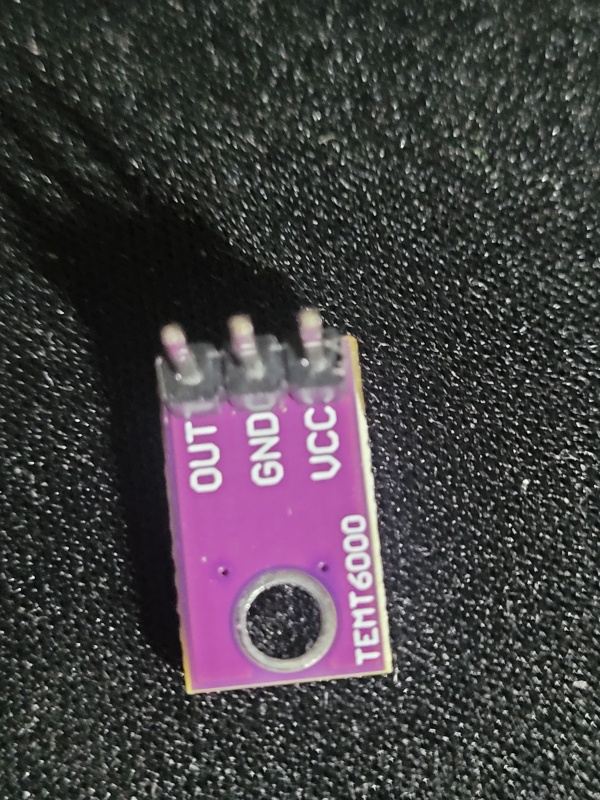
👉🏻 먼저 인두기로 센서와 핀을 납땜합니다.
First, solder the sensor and pins with a soldering iron.
–납땜하기 전 / Before soldering
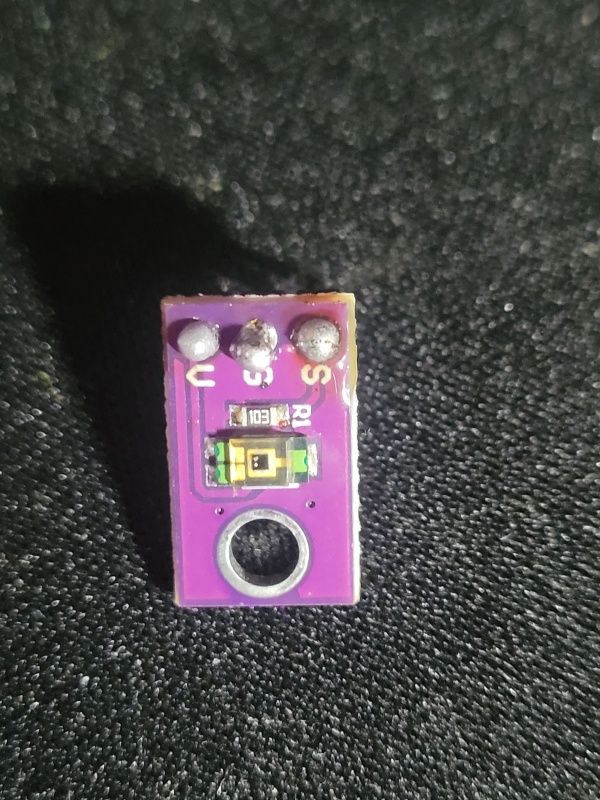
— 납땜 후(핀의 긴 부분이 센서 뒷 부분에 보이게 납떔합니다.)
After soldering (solder so that the long part of the pin is visible on the back of the sensor).
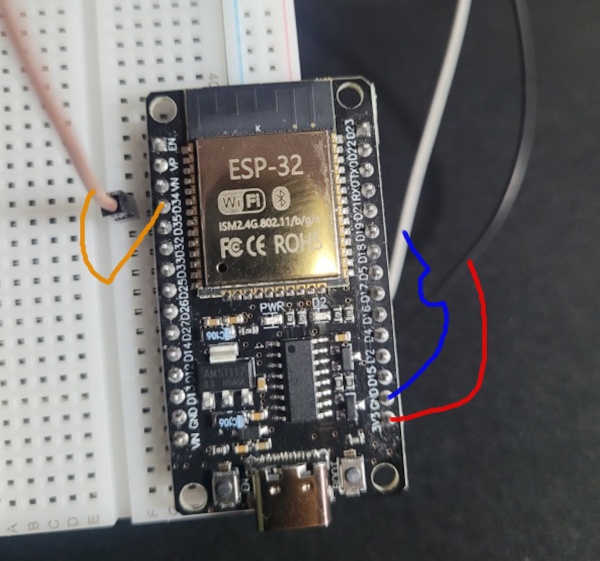
👉🏻 결선 방법 / Wiring method
✔️ ESP32 SGV연결 / ESP32 SGV connection
— SGV부분을 보드의 핀과 연결합니다.
Connect the SGV part to the pin on the board.
— GPIO034는 WROOM보드에서 D34와 같습니다.
GPIO034 is the same as D34 on the WROOM board.
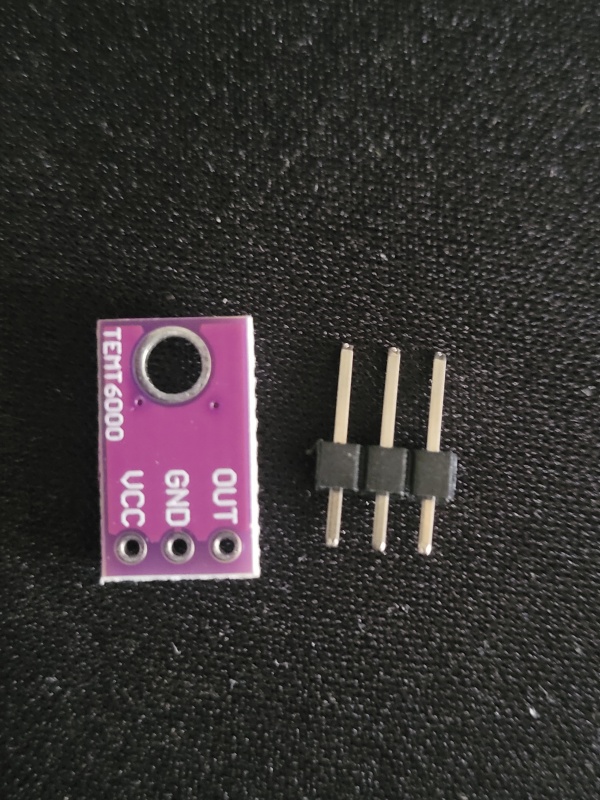
S → ESP32 ADC 핀(예 GPIO34) / ESP32 ADC pin (e.g., GPIO34)
G → GND
V → 3.3V
✔️ 갈색 전선은 Sensor, 청색은 GND(-),빨간색은 3.3V(+)입니다.
The brown wire is the Sensor, the blue wire is GND(-), and the red wire is 3.3V(+).
✔️ TEMT6000 조도센서에는 다음과 같이 연결합니다.
Connect the TEMT6000 light sensor as follows.
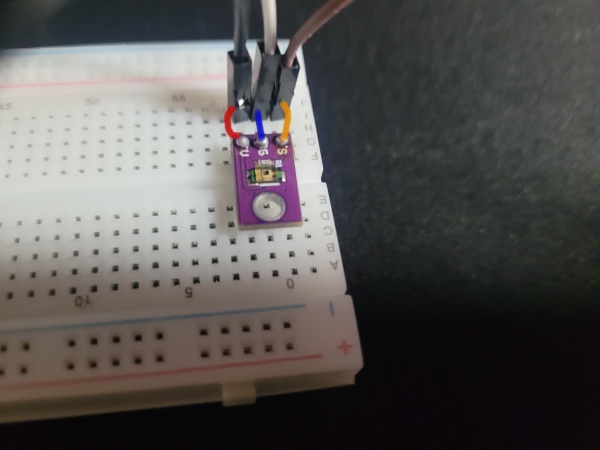
✔️전체 결선 / full wirering
✔️ ADC1 ,ADC2
- ADC1: Wi‑Fi 사용 중에도 안정적으로 읽히는 핀입니다.
This is a pin that is reliably read even while using Wi-Fi. - ADC2: Wi‑Fi가 켜져 있으면 이 핀은 데이터 읽기가 막히거나 값이 불안정해질 수 있습니다.
If Wi-Fi is turned on, data reading from this PIN may be blocked or the value may become unstable.
ESP32(DevKit 기준)에서/On ESP32 (DevKit):

ADC1 핀: GPIO32, 33, 34, 35, 36, 39
ADC2 핀: GPIO0, 2, 4, 12, 13, 14, 15, 25, 26, 27
👉🏻 코드 업로드 / Upload Code
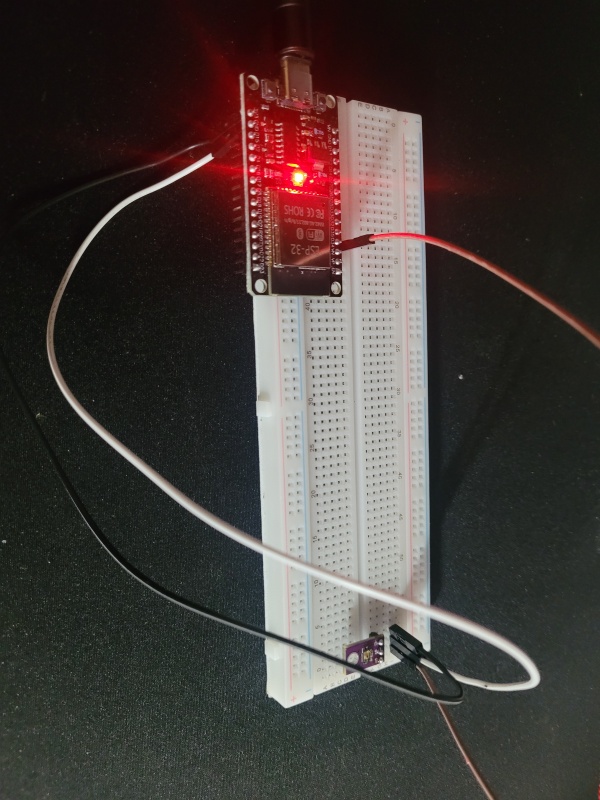
✔️ 다음 코드를 ESP32보드에 업로드 합니다.
Upload the following code to the ESP32 board.
✔️ 모든 설정은 이전과 동일합니다.
All settings are the same as before.
✔️ 코드가 업로드되지 않거나 업로드가 중지되는경우 전체 시스템을 재부팅해보세요
If the code does not upload or the upload stops, try rebooting the entire system.
const int sensorPin = 34; // GPIO34 (ADC1)

void setup() {
  Serial.begin(115200);
}

void loop() {
  int value = analogRead(sensorPin); // 0~4095
  Serial.println(value);
  delay(500);
}
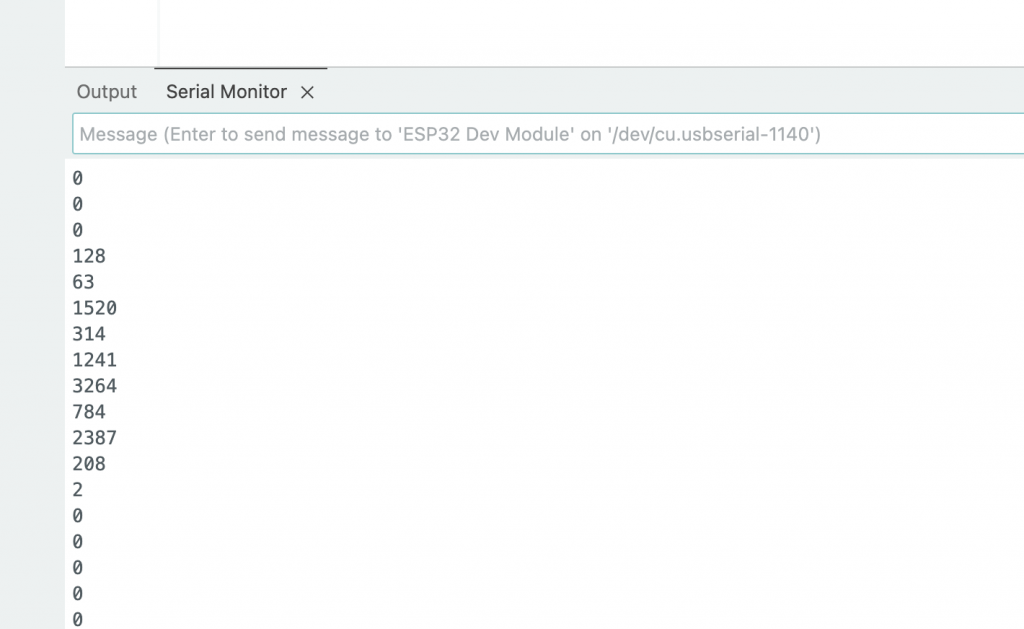
✔️ 업로드가 완료되고 나서 센서에 불빛을 비추면 이렇게 값이 확인되는것을 볼 수 있습니다.
Once the upload is complete, if you shine a light on the sensor, you can see the value confirmed like this.
✔️ 저의 경우는 주위 환경이 어두워서 기본값이 0으로 표시됩니다.
In my case, the surrounding environment is dark, so the default value is displayed as 0.
✔️ 숫자로 찍히는 값은 ADC원시 값으로 ADC는 0~3.3V를 측정해서 그걸 12비트(2¹² = 4096 )로 나눠서 0~4095 숫자로 표현되는 값입니다.
The numerical value displayed is the raw ADC value. The ADC measures 0 to 3.3V and divides it into 12 bits(2¹² = 4096 ) to represent a value ranging from 0 to 4095.