👉️ 32비트 보호모드에서 화면에 글자쓰는 코드입니다.(그래픽 모드 유지상태)
This is code for writing text to the screen in 32-bit protected mode (while maintaining graphics mode).
👉️ 파일 / files
— kernel.c파일을 제외하곤 기존의 내용과 동일합니다.
Except for the kernel.c file, the contents are identical to the original.
boot.asm kernel.c sector2.asm👉️ 코드 / Code
✔️ kernel.c
typedef unsigned char byte;
// ------------------------------------------------------------------------
// 1. 기본 그래픽 함수 (volatile 적용으로 메모리 강제 쓰기)
// Basic graphics functions (forced memory write via volatile)
// ------------------------------------------------------------------------
void draw_pixel(int x, int y, byte color) {
volatile byte *vram = (volatile byte *)0xA0000;
vram[(y * 320) + x] = color;
}
void clear_screen(byte color) {
for (int y = 0; y < 200; y++) {
for (int x = 0; x < 320; x++) {
draw_pixel(x, y, color);
}
}
}
// ------------------------------------------------------------------------
// 2. 글자 출력 함수 (폰트 데이터를 함수 내부로 이동하여 링킹 오류 해결)
// Character output function (resolved linking errors by moving font data inside the function)
// ------------------------------------------------------------------------
void draw_char(int start_x, int start_y, int font_index, byte color) {
// 링커 오류를 방지하기 위해 폰트 데이터를 함수 내부 지역 변수로 선언합니다.
// To prevent linker errors, declare the font data as a local variable within the function.
byte font_8x8[6][8] = {
{0x18, 0x24, 0x42, 0x7E, 0x42, 0x42, 0x42, 0x00}, // A (index 0)
{0x7C, 0x42, 0x42, 0x7C, 0x42, 0x42, 0x7C, 0x00}, // B (index 1)
{0x3C, 0x42, 0x40, 0x40, 0x40, 0x42, 0x3C, 0x00}, // C (index 2)
{0x78, 0x44, 0x42, 0x42, 0x42, 0x44, 0x78, 0x00}, // D (index 3)
{0x7E, 0x40, 0x40, 0x78, 0x40, 0x40, 0x7E, 0x00}, // E (index 4)
{0x7E, 0x40, 0x40, 0x78, 0x40, 0x40, 0x40, 0x00} // F (index 5)
};
for (int y = 0; y < 8; y++) {
byte row_data = font_8x8[font_index][y];
for (int x = 0; x < 8; x++) {
// 비트 마스킹 연산으로 1인 부분만 점을 찍음
// Plot points only at positions corresponding to 1s using bitmasking operations.
if ((row_data & (0x80 >> x)) != 0) {
draw_pixel(start_x + x, start_y + y, color);
}
}
}
}
// ------------------------------------------------------------------------
// 3. 커널 메인 함수
// Kernel main function
// ------------------------------------------------------------------------
void kernel_main(void) {
// 배경을 파란색(1)으로 초기화
// Reset the background to blue (1).
clear_screen(1);
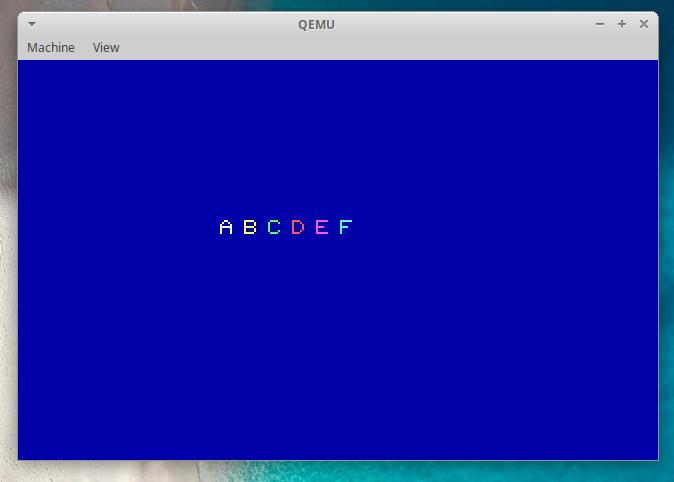
// 화면 중앙(X=100, Y=80) 근처에 다른 색상으로 A, B, C, D, E, F 출력
// Display A, B, C, D, E, and F in different colors near the center of the screen (X=100, Y=80)
draw_char(100, 80, 0, 15); // 흰색/white 'A'
draw_char(112, 80, 1, 14); // 노란색/yellow 'B'
draw_char(124, 80, 2, 10); // 초록색/green 'C'
draw_char(136, 80, 3, 12); // 빨간색/red 'D'
draw_char(148, 80, 4, 13); // 자색/Purple 'E'
draw_char(160, 80, 5, 11); // 청록색/blue-green 'F'
while (1) {
__asm__ __volatile__("hlt");
}
}
👉️ 코드설명 / Code Explanation
✔️ byte 타입선언 / byte type declaration
typedef unsigned char byte;— typedef
1)”Type Definition”의 줄임말로, 기존에 존재하는 데이터 타입에 새로운 별명(별칭)을 붙여주는 키워드입니다.
Short for “Type Definition,” this is a keyword used to assign a new alias to an existing data type.
2)긴 이름을 짧게 줄여서 사용 할 수 있게 해줍니다.
It allows you to shorten long names for use.
3)typeof문법은 아래처름 사용됩니다.
The typeof syntax is used as shown below.
typedef [기존 자료형/Existing data type] [새로운 별명 /New alias];4)typeof를 사용하면 아래처럼 데이터 타입을 줄여서 사용할 수 있습니다.
By using typeof, you can use a shortened form for the data type, as shown below.
# 별칭을 사용하지 않은 경우
# When no alias is used
volatile unsigned char *vram = (volatile unsigned char *)0xA0000;

# 별칭을 사용하는 경우
# When using aliases
volatile byte *vram = (volatile byte *)0xA0000;
— unsigned char
1)C언어에서 기본으로 제공하는 가장 작은 단위의 데이터 자료형입니다.
It is the smallest unit of data type provided by default in the C language.
2)char는 기본적으로 1바이트(8비트) 크기의 메모리를 가집니다.
A char typically occupies 1 byte (8 bits) of memory.
3)unsigned는 ‘부호가 없다’는 뜻입니다. 마이너스((-)) 음수를 표현하지 않겠다는 의미입니다.
‘Unsigned’ means ‘without a sign.’ It signifies that negative numbers (indicated by a minus sign) are not represented.
4)일반적인 char는 (-128 ~ +127)까지 표현하지만, 부호를 없앤 unsigned char는 8비트 전체를 양수로만 사용하여 (0 ~ 255)까지 표현할 수 있습니다.
While a standard char represents values from -128 to +127, an unsigned char—which removes the sign bit—uses all 8 bits for positive values, allowing it to represent a range of 0 to 255.
✔️ draw_pixel함수
draw_pixel function
— 특정 좌표 ((x, y))에 원하는 색상의 점(픽셀) 하나를 찍는 함수입니다.
This is a function that plots a single point (pixel) of a desired color at specific coordinates (x, y).
void draw_pixel(int x, int y, byte color) {
    volatile byte *vram = (volatile byte *)0xA0000;
    vram[(y * 320) + x] = color;
}
–draw_pixel함수 파라메터
draw_pixel function parameters
1)x 는 가로좌표,y는 세로좌표이며 가로는 319번,세로 199번까지 가능합니다.(해상도 300 x 200)
x represents the horizontal coordinate and y the vertical coordinate; the horizontal range is 0 to 319, and the vertical range is 0 to 199 (resolution: 300 x 200).
2)color는 256색을 사용하므로 256번까지 사용가능합니다.
Since the color setting uses a 256-color palette, values up to 256 can be used.
–0xA0000
1)IBM PC 호환 컴퓨터에서 VGA 그래픽 카드의 화면 메모리가 시작되는 물리적 주소입니다. 이 주소에 데이터를 쓰면 모니터 화면에 그대로 나타납니다.
This is the physical address where the screen memory of a VGA graphics card begins on an IBM PC-compatible computer. Writing data to this address causes it to appear directly on the monitor screen.
–volatile
1)컴파일러는 속도를 높이기 위해서 한번 읽어 온 값을 cpu레지스터에 저장해두고 사용합니다.
To increase speed, the compiler stores a value it has read into a CPU register and uses it from there.
2)volatile키워드를 사용하면 레지스터의 값을 참조하지 않고 바로 메모리에서 값을 가져옵니다.
When the volatile keyword is used, the value is retrieved directly from memory instead of referencing the value in a register.
— 문자의 위치 설정
Setting the text position
vram[(y * 320) + x] = color;1)vram배열은 단순 값의 나열이고 나중에 실제로 X,Y위치를 잡기위해 데이터 셋팅합니다.
The VRAM array is simply a sequence of values; the data is configured later to actually determine the X and Y positions.
— 화면의 배경색을 지정합니다.
Specifies the background color of the screen.
void clear_screen(byte color) {
    for (int y = 0; y < 200; y++) {
        for (int x = 0; x < 320; x++) {
            draw_pixel(x, y, color);
        }
    }
}
1)kernel_main함수에서 clear_screen(1)을 지정해서 화면을 파랑색으로 셋팅합니다.
In the kernel_main function, specify clear_screen(1) to set the screen color to blue.
void kernel_main(void) {
    // 배경을 파란색(1)으로 초기화
    // Reset the background to blue (1).
    clear_screen(1);

    ...
}
✔️ draw_char함수
draw_char function
— ‘A’의 데이터 시각화
Data visualization of ‘A’
1){0x18, 0x24, 0x42, 0x7E, 0x42, 0x42, 0x42, 0x00}을 2진수로 바꾸어 8×8 모눈종이에 채우면 다음과 같은 모양이 나옵니다.
If you convert {0x18, 0x24, 0x42, 0x7E, 0x42, 0x42, 0x42, 0x00} into binary and fill in an 8×8 grid, the following shape is formed.
| 행/Col (Y) | 16진수/Hexadecimal | 2진수 변환 (8비트) Binary Conversion (8-bit) | 실제 글자 모양 Actual character shape |
| 0번째/0th | 0x18 | 00011000 | ░░░██░░░ |
| 1번째/1st | 0x24 | 00100100 | ░░█░░█░░ |
| 2번째/2nd | 0x42 | 01000010 | ░█░░░░█░ |
| 3번째/3rd | 0x7E | 01111110 | ░██████░ |
| 4번째/4th | 0x42 | 01000010 | ░█░░░░█░ |
| 5번째/5th | 0x42 | 01000010 | ░█░░░░█░ |
| 6번째/6th | 0x42 | 01000010 | ░█░░░░█░ |
| 7번째/7th | 0x00 | 00000000 | ░░░░░░░░ |
— 화면에 글자 그리기 / Drawing text on the screen
    for (int y = 0; y < 8; y++) {
        byte row_data = font_8x8[font_index][y];

        for (int x = 0; x < 8; x++) {
            // 비트 마스킹 연산으로 1인 부분만 점을 찍음
            // Plot points only at positions corresponding to 1s using bitmasking operations.
            if ((row_data & (0x80 >> x)) != 0) {
                draw_pixel(start_x + x, start_y + y, color);
            }
        }
    }
1)반복문이 실행되면서 font_8x8 배열에서 해당하는 문자의 값을 하나씩 꺼냅니다.
As the loop executes, it retrieves the values for the corresponding characters from the font_8x8 array one by one.
byte row_data = font_8x8[font_index][y];2)0x80 >> x
2-1) 16진수 0x80은 이진수로 10000000값이 됩니다.
The hexadecimal value 0x80 corresponds to the binary value 10000000.
2-2) 반복문이 실행되면 x = 0 일 때: 10000000,x = 1 일 때: 01000000,x = 2 일 때: 00100000 이렇게 비트가 이동합니다.
When the loop executes, the bits shift as follows: 10000000 when x = 0, 01000000 when x = 1, and 00100000 when x = 2.
3) row_data & (…)
3-1) 앤드 연산으로 row_data와 0x80 >> x값을 확인합니다.
Check row_data and the value of 0x80 >> x using an AND operation.
3-2)row_data가 A문자를 그리고 0x80 >> 0 인경우로 앤드 연산의 결과가 00000000 이므로 점을 찍지 않습니다.
If row_data represents the character ‘A’ and the operation is 0x80 >> 0, the result of the AND operation is 00000000, so no dot is drawn.
  00011000  (row_data: 'A'의 첫 줄 / row_data: First line of 'A')
& 10000000  (0x80 >> 0)
------------
  00000000
3-3) x=3일때 4번째 비트가 1이 됩니다.
  00011000  (row_data: 'A'의 첫 줄 / row_data: First line of 'A')
& 00010000  (0x80 >> 3)
------------
  00010000
3-4)비트가 1인 부분은 draw_pixel함수를 사용해서 점을 찍습니다.
For parts where the bit is 1, a dot is drawn using the draw_pixel function.
draw_pixel(start_x + x, start_y + y, color);3-5) 정리하면 첫번째줄부터 8번째 줄까지 좌측에서 우측으로 8비트를 순서대로 확인해서 점을 찍어서 문자를 출력합니다.
To summarize, the process involves checking 8 bits in order from left to right across the first eight lines and outputting characters by plotting points.
✔️ 절전 및 대기상태 / Power Saving and Standby Modes
1)__asm_ 어셈블러 코드를 사용하는 키워드입니다.__asm is a keyword used for assembler code.
2)__volatile__ hlt명령어를 컴파일러가 삭제하지 못하게 막는 기능입니다.__volatile__ prevents the compiler from removing the hlt instruction.
3)hlt는 다음 신호 (인터럽트) 올때 까지 대기상태로 설정합니다.
The HLT instruction sets the processor to a waiting state until the next signal (interrupt) arrives.
    while (1) {
        __asm__ __volatile__("hlt");
    }
👉️ 컴파일
# 1. 부트섹터 및 보호모드 진입부 컴파일
nasm -f bin boot.asm -o boot.bin
nasm -f elf32 sector2.asm -o sector2.o

# 2. 새로 수정한 kernel.c 컴파일
gcc -m32 -c kernel.c -o kernel.o -nostdlib -fno-builtin -fno-stack-protector -fno-pic -fno-PIE

# 3. 하나의 바이너리로 결합
ld -m elf_i386 -Ttext 0x8000 -e start -o sector2.bin sector2.o kernel.o --oformat binary

# 4. 이미지 생성 및 실행
cat boot.bin sector2.bin > temp.bin
dd if=temp.bin of=os.img bs=512 count=2880 conv=sync
qemu-system-x86_64 -drive file=os.img,format=raw,if=floppy -boot a