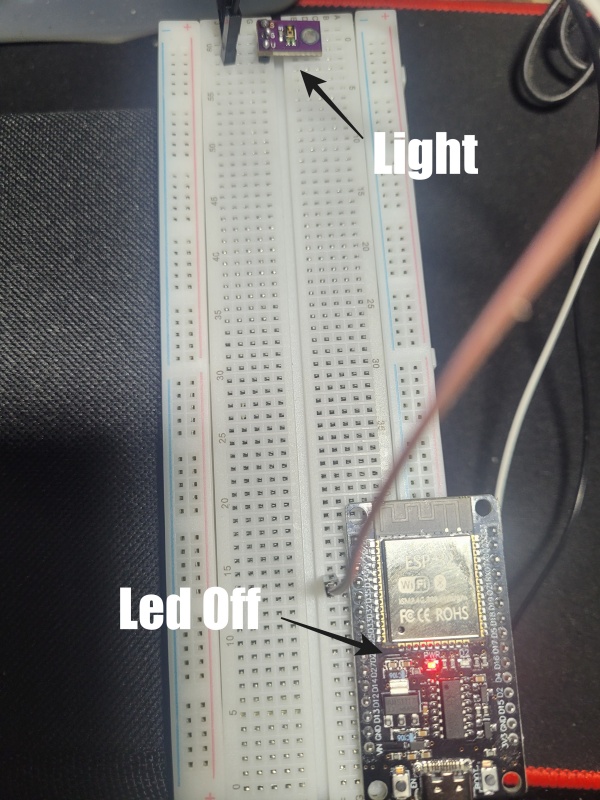
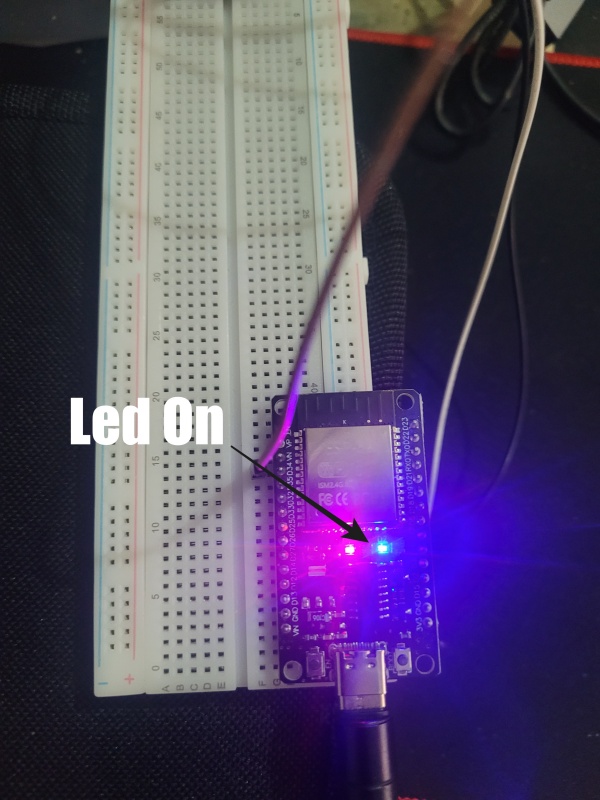
👉🏻 주위환경이 어두우면 ESP32보드의 LED가 점등되고 TEMT-6000센서에 빛을 비추면 LED가 소등됩니다.
When the surrounding environment is dark, the LED on the ESP32 board lights up, and when light is shone on the TEMT-6000 sensor, the LED turns off.
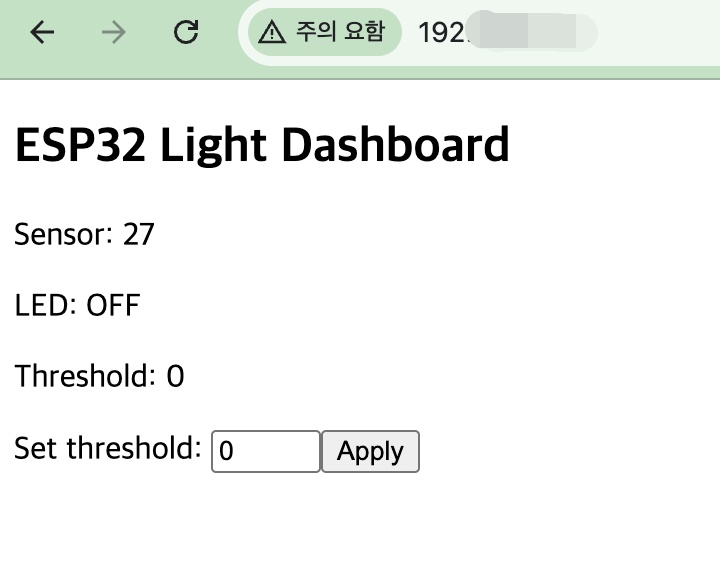
👉🏻 웹 대시보드에 접속해서 조도 기준 값을 변경해서 LED를 소등시킬 수 있습니다.
You can turn off the LED by accessing the web dashboard and changing the illuminance threshold value.
👉🏻 배선은 기존과 동일합니다.
The wiring is the same as the existing one.
S → ESP32 ADC 핀(예 GPIO34) / ESP32 ADC pin (e.g., GPIO34)
G → GND
V → 3.3V
👉🏻 코드 / Code
✔️ 아두이노 IDE 설정은 기존과 동일합니다.
The Arduino IDE settings are the same as before.
#include <WiFi.h>
#include <WebServer.h>

const char* ssid = "YOUR_SSID";
const char* password = "YOUR_PASSWORD";

WebServer server(80);

const int sensorPin = 34;   // TEMT6000 S 연결 (ADC1) / The TEMT6000 S is connected to ADC1.
const int ledPin = 2;       // WROOM 온보드 LED 보통 GPIO2 / The WROOM on-board LED is usually GPIO2.

int threshold = 1000;       // 이 값보다 어두우면 LED ON / If it is darker than this value, the LED turns on. (0~4095)
int sensorValue = 0;
bool ledOn = false;

void handleRoot() {
  String html = "<!doctype html><html><head><meta charset='utf-8'>";
  html += "<meta name='viewport' content='width=device-width,initial-scale=1'>";
  html += "<title>ESP32 Light Dashboard</title></head><body>";
  html += "<h2>ESP32 Light Dashboard</h2>";
  html += "<p>Sensor: <span id='v'>-</span></p>";
  html += "<p>LED: <span id='l'>-</span></p>";
  html += "<p>Threshold: <span id='t'>-</span></p>";
  html += "<form action='/set' method='get'>";
  html += "Set threshold: <input name='th' type='number' min='0' max='4095' value='" + String(threshold) + "'>";
  html += "<button type='submit'>Apply</button></form>";
  html += "<script>";
  html += "async function refresh(){";
  html += "const r=await fetch('/data'); const d=await r.json();";
  html += "document.getElementById('v').textContent=d.sensor;";
  html += "document.getElementById('l').textContent=d.led?'ON':'OFF';";
  html += "document.getElementById('t').textContent=d.threshold;";
  html += "}";
  html += "setInterval(refresh,1000); refresh();";
  html += "</script></body></html>";
  server.send(200, "text/html", html);
}

void handleData() {
  String json = "{\"sensor\":" + String(sensorValue) +
                ",\"threshold\":" + String(threshold) +
                ",\"led\":" + String(ledOn ? "true" : "false") + "}";
  server.send(200, "application/json", json);
}

void handleSet() {
  if (server.hasArg("th")) {
    int t = server.arg("th").toInt();
    if (t >= 0 && t <= 4095) threshold = t;
  }
  server.sendHeader("Location", "/");
  server.send(302, "text/plain", "OK");
}

void setup() {
  Serial.begin(115200);
  pinMode(ledPin, OUTPUT);

  WiFi.begin(ssid, password);
  while (WiFi.status() != WL_CONNECTED) { delay(500); }

  Serial.print("IP: ");
  Serial.println(WiFi.localIP());

  server.on("/", handleRoot);
  server.on("/data", handleData);
  server.on("/set", handleSet);
  server.begin();
}

void loop() {
  server.handleClient();

  sensorValue = analogRead(sensorPin);
  ledOn = (sensorValue < threshold); // 어두우면 ON / If it is darker than the threshold, turn on the LED.

  digitalWrite(ledPin, ledOn ? HIGH : LOW);
  delay(100);
}
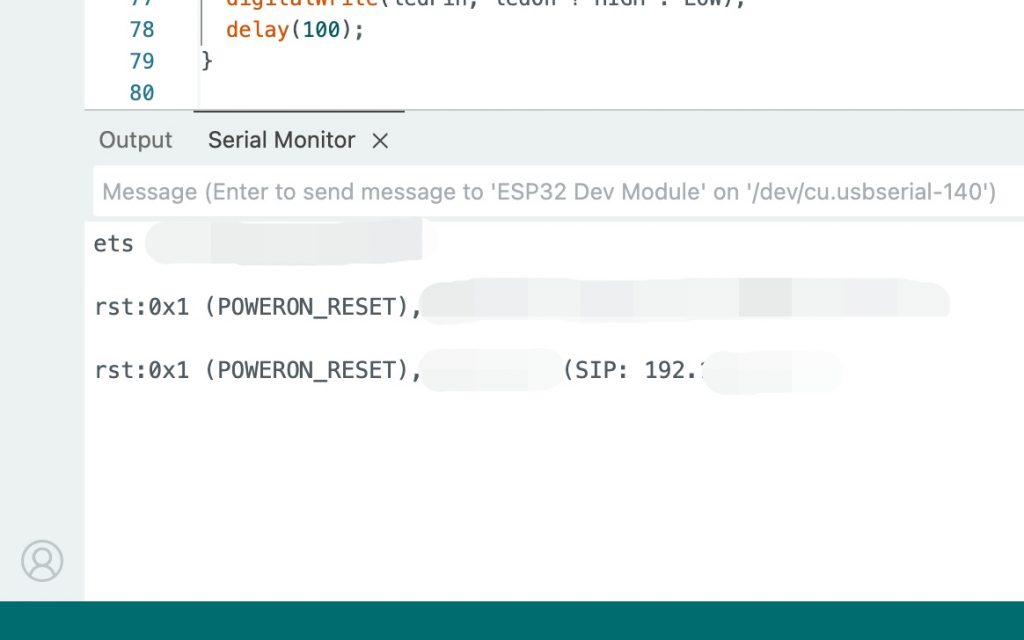
👉🏻 위의 코드를 업로드하고 Serial Monitor를 열면 아래처럼 ESP32 보드의 아이피 주소가 출력됩니다.
If you upload the code above and open the Serial Monitor, the IP address of the ESP32 board will be displayed as shown below.
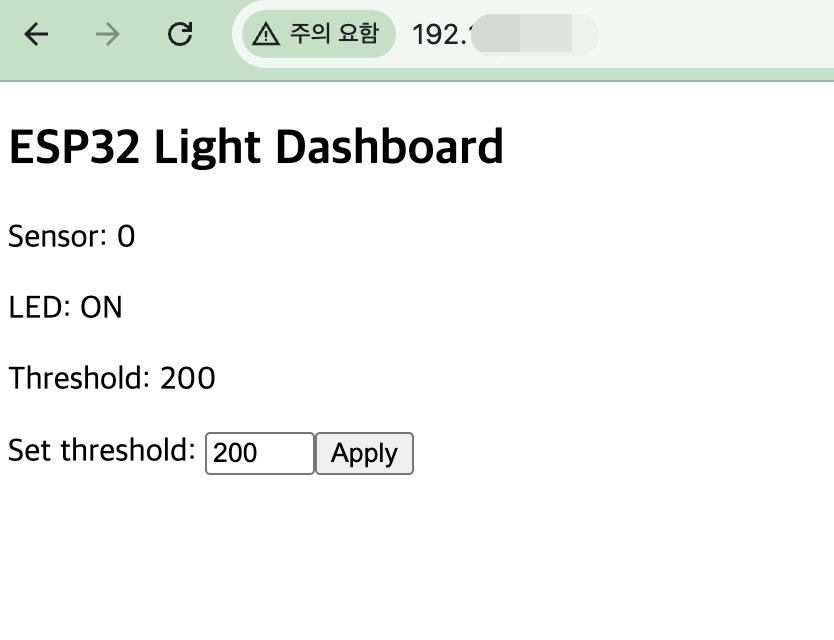
👉🏻 웹 대시보드에 접속하면 아래처럼 조도 기준 값(threshold)을 변경해서 ESP32보드의 LED를 점등 시키거나 소등시킬 수 있습니다.
When you access the web dashboard, you can turn the ESP32 board’s LED on or off by changing the illuminance threshold value as shown below.
✔️ 웹 대시보드 / web dashboard
✔️ ESP32