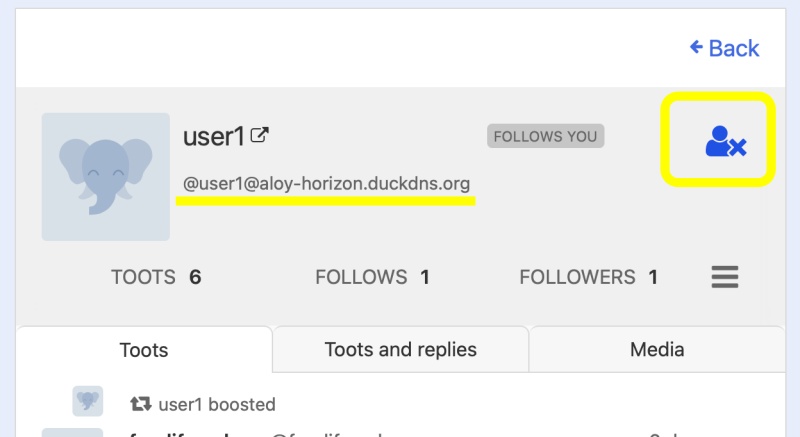
👉🏻 inbox_posts 테이블에 actor와 original_id필드를 추가 합니다.
Add the actor and original_id fields to the inbox_posts table.
👉🏻 original_id필드는 나중에 id(API의 id 부분)를 짧게 변환하기 위해서 만든 필드입니다.
The original_id field was created to store a shortened version of the id (the ID portion of the API) for later use.
👉🏻 Actor는 글 보낸 사람의 전체 URL입니다.
“Actor” is the full URL of the person who sent the post.
👉🏻 기존의 타임라인 UI부분의 주소에 @userid를 사용합니다.
Use @userid in the URL for the existing timeline UI section.
📁 전체 프로젝트 구조 / Overall Project Structure
myapp19/
├── app/  (Next.js App Router)
│   ├── .well-known/webfinger/route.ts  -> webfinger
│   ├── api/posts/route.ts     -> Writing API
│   ├── api/follow/route.ts    -> Follow API(temporary)
│   ├── api/timeline/route.ts  -> Timeline API
│   ├── users/[username]/
│   │   ├── statuses/[id]/route.ts -> Indivisual Post
│   │   ├── route.ts               -> Acotr Information
│   │   ├── followers/route.ts     -> Followers List
│   │   ├── following/route.ts     -> Following List
│   │   ├── inbox/route.ts         -> Inbox
│   │   └── outbox/route.ts        -> outbox
│   ├── usersui/[username]/page.tsx  -> Timeline UI
│   ├── layout.tsx, page.tsx, globals.css
│   └── favicon.ico
├── lib/
│   ├── ap.ts                  -> Follow Accept
│   └── db.ts                  -> DB connection
├── data/
│   └── keys/                  -> private.pem, public.pem
├── data.sqlite                -> Database
├── Caddyfile                  -> https
└── package.json
📁 프로젝트 시작(myapp19)
Project Start (myapp19)
npx create-next-app@latest📁 SQLite설치 / Installing SQLite
cd ~/myapp19
npm install better-sqlite3
npm install -D @types/better-sqlite3
📁 DDNS,https설정 / DDNS,https settings
📁 데이터베이스 필드 추가
Add database field
✔️ inbox_posts테이블에 actor가 없다면 actor필드를 추가합니다.
If the actor field does not exist in the inbox_posts table, add it.
ALTER TABLE inbox_posts ADD COLUMN actor TEXT;
ALTER TABLE inbox_posts ADD COLUMN original_id TEXT;
1)inbox_posts테이블에 actor필드를 추가하고 posts테이블에는 추가하지 않습니다.
Add the actor field to the inbox_posts table, but do not add it to the posts table.
— 전체 DB 스키마 / Entire DB schema
sqlite> .schema
CREATE TABLE posts (
    id TEXT PRIMARY KEY,
    content TEXT NOT NULL,
    created_at DATETIME DEFAULT CURRENT_TIMESTAMP
  , username TEXT DEFAULT 'user1');
CREATE TABLE followers (
    id TEXT PRIMARY KEY,
    actor TEXT NOT NULL,
    inbox TEXT NOT NULL
  , username TEXT);
CREATE TABLE users (
  username TEXT PRIMARY KEY,
  display_name TEXT DEFAULT '',
  summary TEXT DEFAULT '',
  private_key TEXT,
  public_key TEXT,
  created_at DATETIME DEFAULT CURRENT_TIMESTAMP
);
CREATE INDEX idx_followers_username ON followers(username);
CREATE INDEX idx_followers_actor ON followers(actor);
CREATE TABLE following (
  id TEXT PRIMARY KEY,
  actor TEXT NOT NULL,
  username TEXT NOT NULL,
  created_at DATETIME DEFAULT CURRENT_TIMESTAMP
);
CREATE INDEX idx_following_username ON following(username);
CREATE INDEX idx_following_actor ON following(actor);
CREATE TABLE inbox_posts (
  id TEXT PRIMARY KEY,
  actor TEXT,
  content TEXT,
  username TEXT,
  created_at DATETIME DEFAULT CURRENT_TIMESTAMP
, original_id TEXT);
CREATE INDEX idx_posts_username_created ON posts(username, created_at DESC);
CREATE INDEX idx_inbox_username_created ON inbox_posts(username, created_at DESC);
CREATE INDEX idx_inbox_actor ON inbox_posts(actor);
sqlite>
✔️ 타임라인 라우트 코드 수정
Modify timeline route code
— myapp19/app/api/timeline/route.ts
// myapp19 ✅
  const timeline = db.prepare(`
    SELECT id, content, username, username as actor, created_at, 'mine' as source
    FROM posts WHERE username = ?
    UNION ALL
    SELECT id, content, username, actor, created_at, 'inbox' as source
    FROM inbox_posts WHERE username = ?
    ORDER BY created_at DESC
    LIMIT 50
`).all(username, username);
1)타임라인 API로 데이터베이스의 Actor를 조회합니다.
Query the database for the Actor using the Timeline API.
✔️ 타임라인 UI 라우트 코드 수정
Modify timeline UI route code.
— myapp19/app/usersui/[username]/page.tsx
... ...

  const timeline = db.prepare(`
    SELECT id, content, username, username as actor, created_at, 'mine' as source
    FROM posts WHERE username = ?
    UNION ALL
    SELECT id, content, username, actor, created_at, 'inbox' as source
    FROM inbox_posts WHERE username = ?
    ORDER BY created_at DESC LIMIT 50
  `).all(username, username) as any[];

... ...

  return (
    <div style={{ padding: 20 }}>
      <h1>{username} 타임라인 / Timeline</h1>
      <ul>
        {timeline.map((p:any) => (
          <li key={`${p.source}-${p.id}`}>
            [{p.source}] <b>{p.actor}</b>: {p.content} - {p.created_at}
          </li>
        ))}
      </ul>
    </div>
  );
1)타임라인UI에서 Actor를 보여줍니다.
Displays the Actor in the timeline UI.
✔️ 인박스 라우트 코드 수정
Modify inbox route code
— myapp19/app/users/[username]/inbox/route.ts
db.prepare(`
INSERT OR IGNORE INTO inbox_posts (id, actor, content, username, original_id, created_at) VALUES (?, ?, ?, ?, ?, ?)`).run(postId, actorId, content, username, note.id, note.published || new Date().toISOString());
1)DB에 Actor와 orginal_id를 저장하는 부분입니다.
This is the part that saves the Actor and original_id to the database.
✔️ 브라우저에서 아래의 주소로 테스트 해봅니다.
Try testing it in your browser using the address below.
— Timeline API
https://aloy-horizon.duckdns.org/api/timeline?username=user1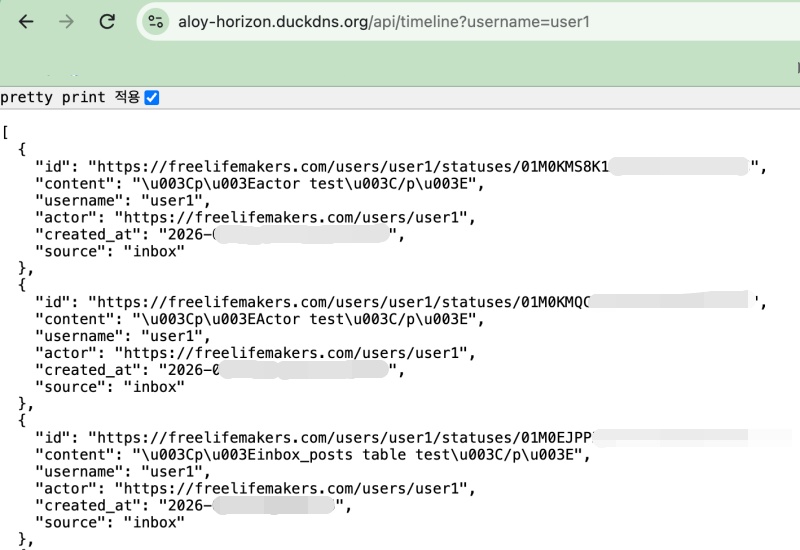
— Timeline UI
https://aloy-horizon.duckdns.org/usersui/user1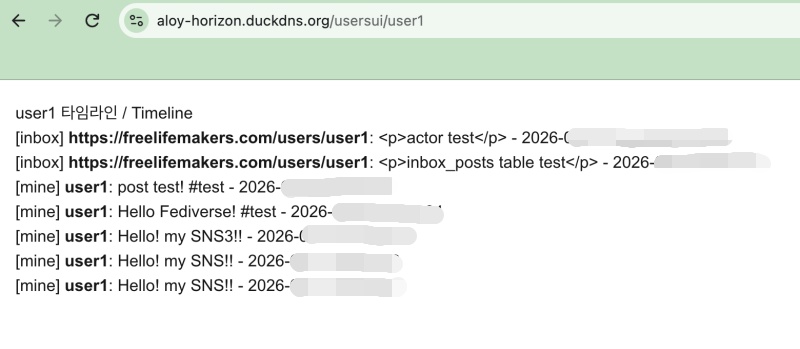
📁 타임라인 주소에 @userid 사용하기
Using @userid in the timeline URL
✔️ myapp19/next.config.ts 코드 수정
Modify myapp19/next.config.ts code
import type { NextConfig } from "next";

const nextConfig: NextConfig = {
  /* allow domain*/
  allowedDevOrigins: ['aloy-horizon.duckdns.org', '*.duckdns.org'],

  /* host.domain.org/@userid */
  async rewrites() {
    return [
      {
        source: '/@:username',
        destination: '/usersui/:username',
      },
    ]
  }
};


export default nextConfig;
1)rewrites()함수는 nextjs예약함수라 자동실행됩니다.
The rewrites() function is a reserved Next.js function, so it executes automatically.
✔️ 서버를 재시작합니다.
Restarting the server.
ctrl + c
npm run dev
✔️ 브라우저에서 다음과 같이 접속해 봅니다.
Try accessing the following in your browser.
https://aloy-horizon.duckdns.org/@user1✔️ 기존의 형식도 사용가능 합니다.
The existing format can also be used.
https://aloy-horizon.duckdns.org/usersui/user1💡 next.config.ts를 수정하지 않고 디렉토리이름을 바꿔도 @userid 형식을 사용할 수 있습니다.
You can use the @userid format even if you change the directory name, without modifying next.config.ts.
app/@[username]/page.tsx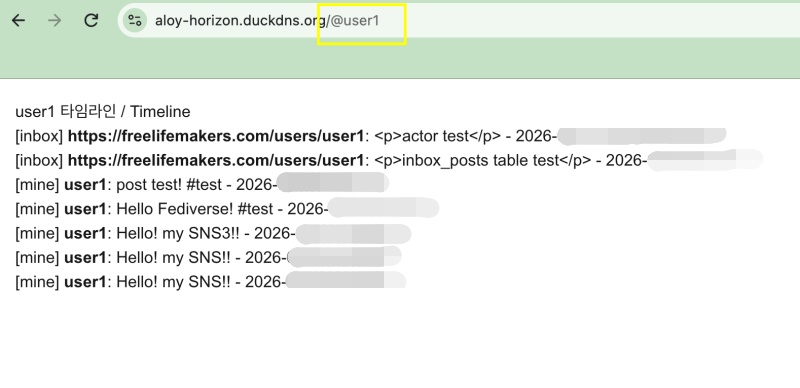
요한복음 8장 32절 / John 8:32
“그리고 너희는 진리를 알게 될 것이며, 진리가 너희를 자유롭게 할 것이다.”
“Then you will know the truth ,and the truth will set you free”