👉🏻 ComfyUI는 인공지능으로 비디오를 생성할 수 있게 해주는 도구입니다.
ComfyUI is a tool that enables you to generate videos using artificial intelligence.
👉🏻 LTX-Video는 비디오생성 인공지능입니다.
LTX-Video is a video generation AI.
👉🏻 ComfyUI에서 비디오 생성 요청을하면 이 ComfyUI가 LTX-Video 인공지능을 불러와서 비디오 생성 요청을하면 인공지능이 비디오를 생성하는 구조입니다.
The structure is such that when a video generation request is made in ComfyUI, ComfyUI calls the LTX-Video AI, and the AI generates the video.
👉🏻 테스트는 맥os M3 램16기가 환경에서 테스트 했습니다.
The test was conducted on a macOS M3 with 16GB of RAM.
👉🏻설치 / Install
✔️ComfyUI다운로드 / ComfyUI Download
https://docs.comfy.org/installation/desktop/macos
✔️ 다운로드 받은 앱을 실행합니다.
Run the downloaded app.
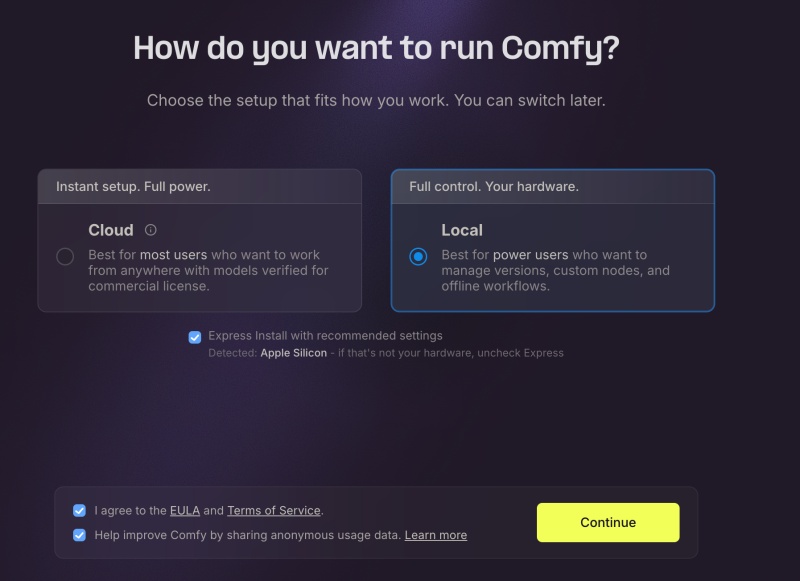
1)아래처럼 Local을 선택하고 체크박스를 모두 선택하고 Continue버튼을 선택합니다.
Select Local as shown below, select all checkboxes, and select the Continue button.
— Cloud는 유료입니다.
The Cloud is paid.
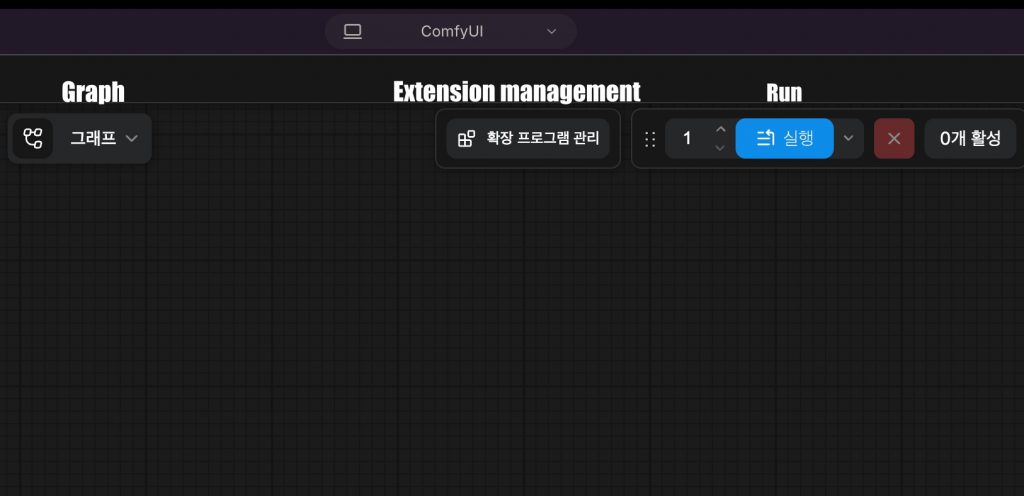
2)셋팅이 완료되면 아래와 같은 바탕하면이 나옵니다.
Once the setup is complete, the desktop shown below will appear.
👉🏻 워크플로우셋팅 및 동영상생성하기
Setting up Workflow and Creating Videos
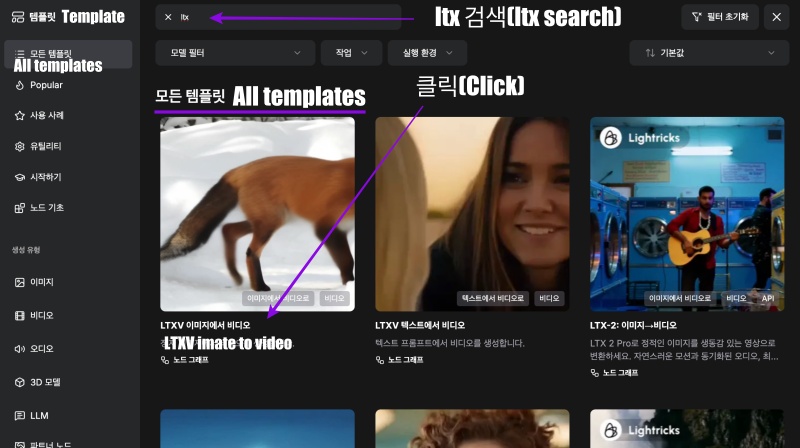
1) 좌측 메뉴에서 템플릿을 선택합니다.
Select a template from the left menu.
2) 모든 템플릿 창에서 LTXV 이미지에서 비디오를 선택합니다.
Select a video from the LTXV image in all template windows.
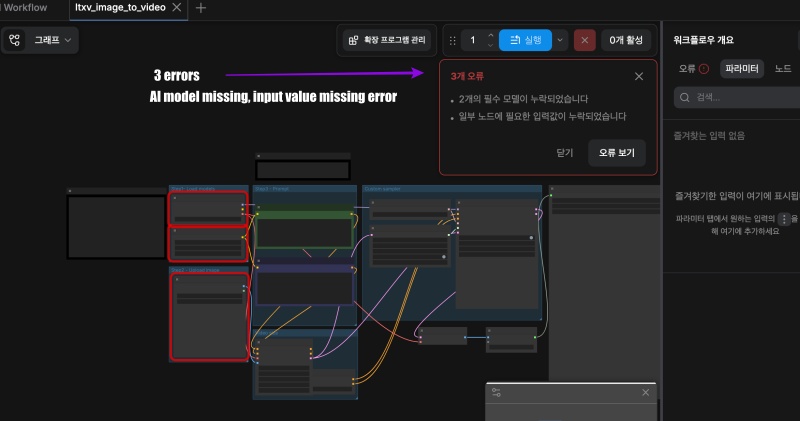
3) 그러면 화면에 다음과 같은 워크플로우를 불러옵니다.
Then, the following workflow is displayed on the screen.
— 워크플로우와 함께 오류가 발생하는것을 확인 할 수 있습니다.
You can confirm that an error is occurring along with the workflow.
— 아직 인공지능 모델이 다운로드 되지 않았고 이미지 선택이 완료되지 않았기 때문입니다.
This is because the AI model has not been downloaded yet and image selection has not been completed.
4)인공지능 모델을 다운로드합니다.
Download the AI model.
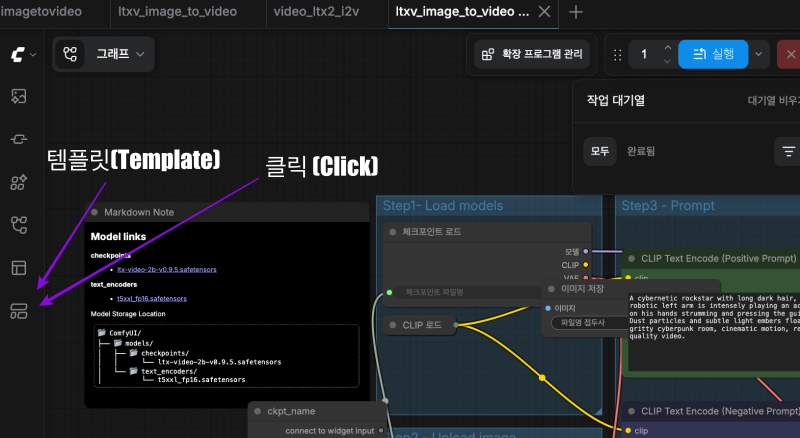
— 불러온 워크플로우에는 Markdown Note가 있습니다.
The imported workflow contains Markdown Notes.
— Model Storage Location위치에 다운로드 받은 파일을 옮겨 놓습니다.
Move the downloaded file to the Model Storage Location.
— 제가 사용하는 맥북에서 실제위치는 아래와 같습니다.
The actual location on the MacBook I use is as follows.
checkpoints:
/Users/userhome/ComfyUI-Installs/ComfyUI (1)/ComfyUI/models/checkpoints

text_encoders :
/Users/userhome/ComfyUI-Installs/ComfyUI (1)/ComfyUI/models/text_encoders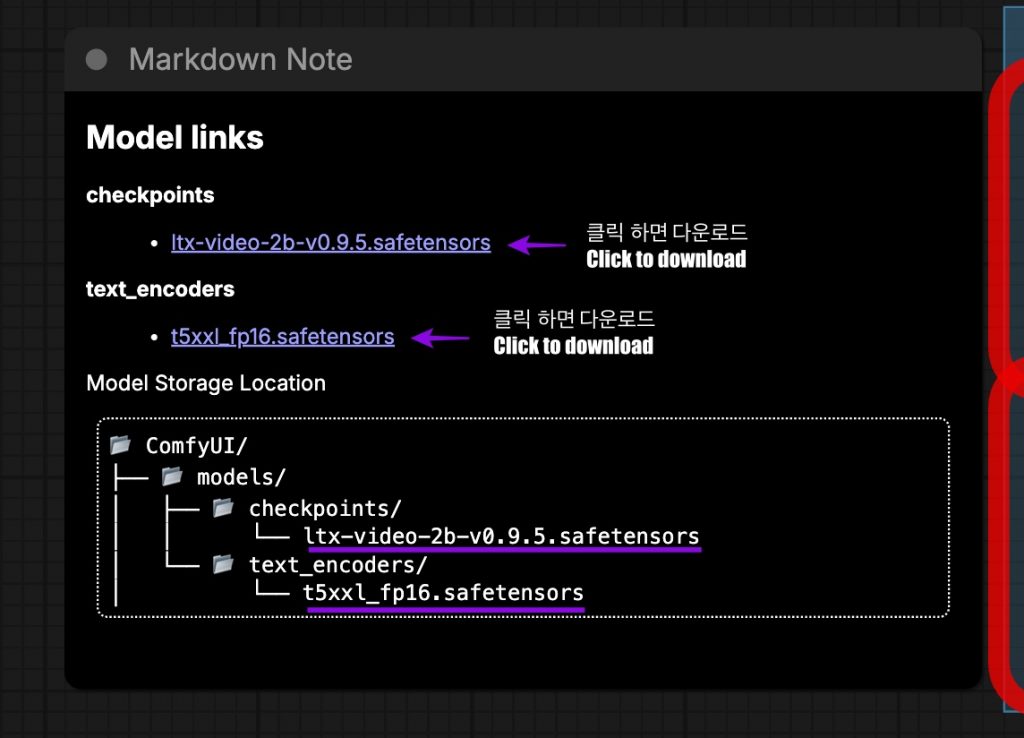
5)워크플로우 / Workflfow
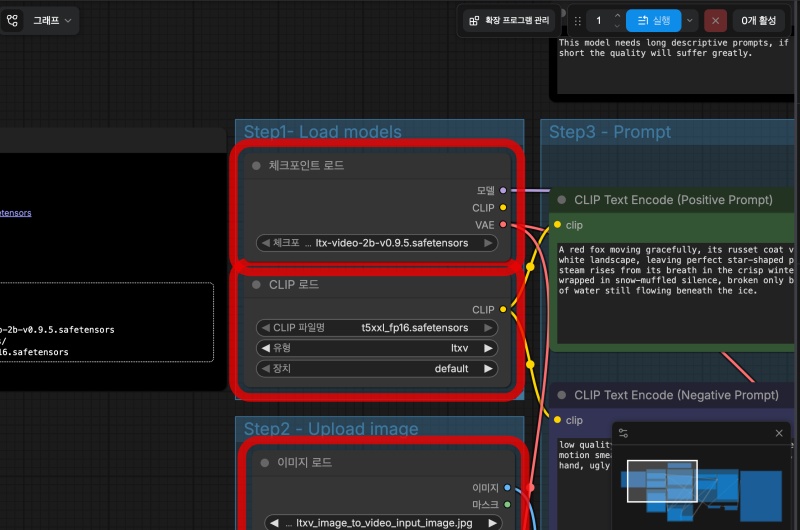
— 아래의 워크플로우에 있는 각 박스는 박스마다 하나의 기능을 구현한것입니다.
Each box in the workflow below implements a single function.
— 연결된 선은 각 기능 마다 데이터 이동통로라고 생각하면됩니다.
You can think of the connected lines as data pathways for each function.
— 프로그래밍언어에서 각 박스는 함수에 해당하고 연결된선은 파라메터라고 이해하면 됩니다.
In programming languages, you can understand that each box corresponds to a function and the connected lines are parameters.
6) 워크플로우 입력 / Workflow input
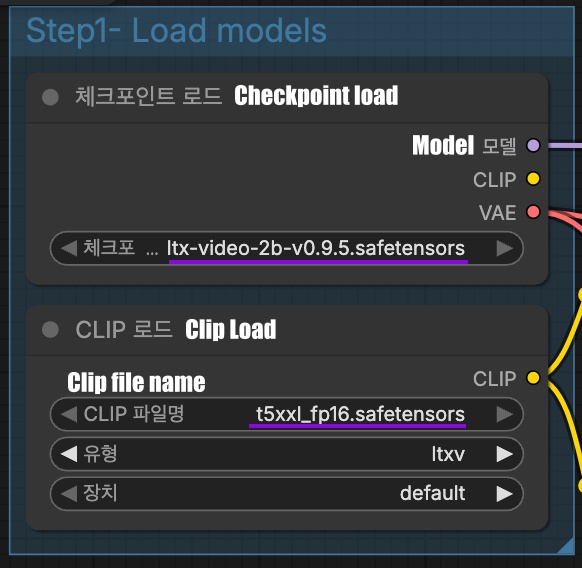
✔️ 인공지능 모델을 확인합니다.
Check the artificial intelligence model.
✔️이미지를 셋팅합니다.
Set the image.
✔️positive 프롬프트와 negative프롬프트를 입력합니다.
Enter the positive prompt and negative prompt.
— 저의 경우는 아래와 같은 positive프롬프트만 입력했습니다.
In my case, I only entered the following positive prompt.
A cybernetic rockstar with long dark hair, sunglasses, and a robotic left arm is intensely playing an acoustic guitar. Close up on his hands strumming and pressing the guitar strings smoothly. Dust particles and subtle light embers floating in the dark, gritty cyberpunk room, cinematic motion, realistic physics, high quality video.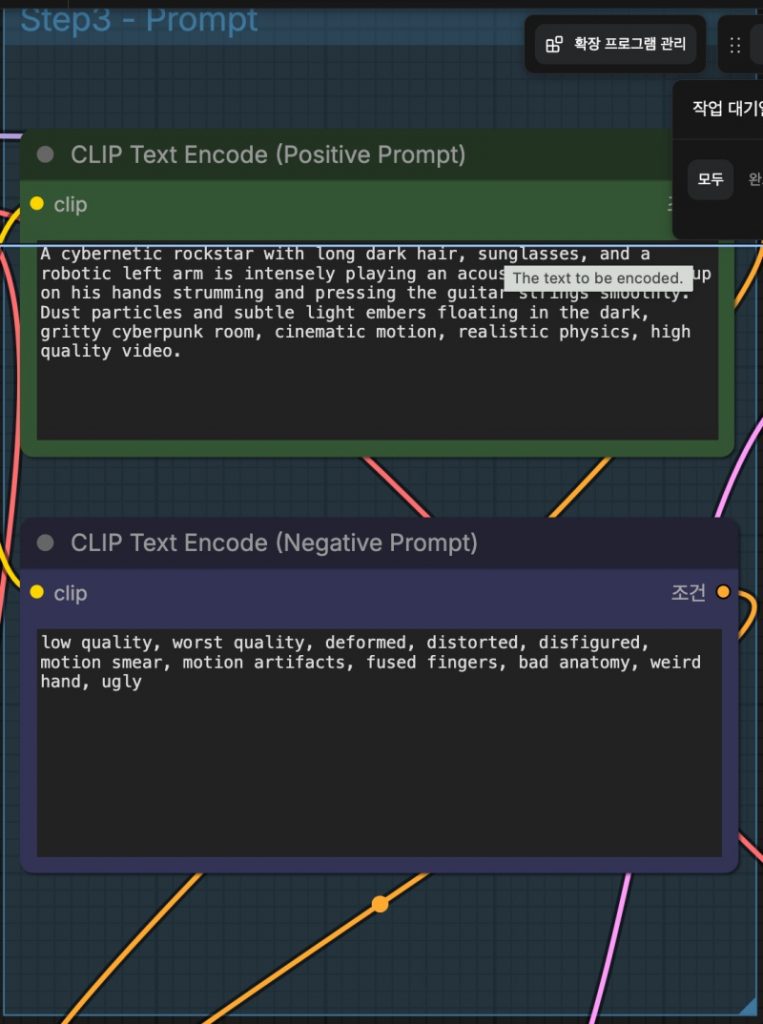
7)동영상생성 / Create video
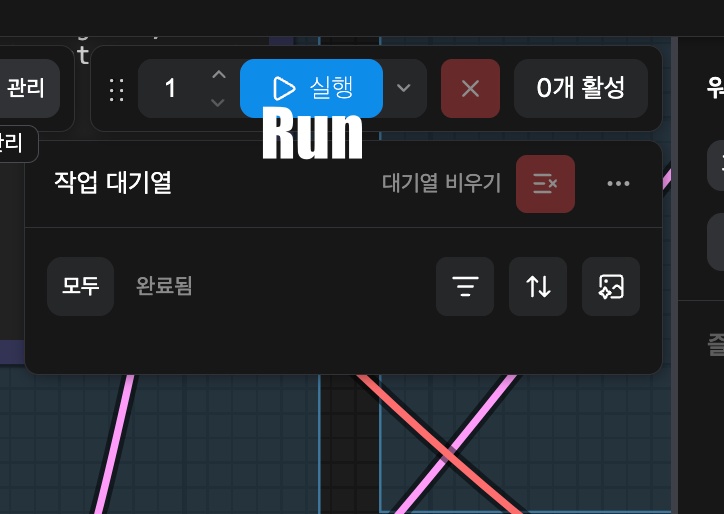
✔️ 실행버튼을 클릭해서 동영상을 생성합니다
Click the play(Run) button to create a video.
✔️ 저의 경우는 동영상 생성하는데 15분정도 걸렸습니다.
In my case, it took about 15 minutes to generate the video.
8)동영상 생성 위치 및 재생
Video creation location and playback
✔️ 아래의 위치에 동영상이 생성됩니다.
A video will be created at the location below.
MacBookAir video % pwd
/Users/userhome/ComfyUI-Shared/output/video
MacBookAir video % ls
ComfyUI_00001_.mp4
✔️ 아래는 생성된 동영상 입니다.
Below is the generated video.
