👉🏻 설치 환경은 맥북 M3 램 16기가 입니다.
The installation environment is a MacBook M3 with 16GB of RAM.
👉🏻 인공지능 모델은 ollama환경에서 gemma4:12b모델 입니다.
The artificial intelligence model is the gemma4:12b model in the ollama environment.
👉🏻 gemma4:12b모델은 램이16기가 정도가 되어야 안정적으로 운영할 수 있습니다.
The gemma4:12b model requires about 16GB of RAM to operate stably.
👉🏻 먼저 ollama설치는 아래의 웹사이트에 접속해서 파일을 다운로드 할 수 있습니다.
First, you can download the file to install ollama by visiting the website below.
https://ollama.com/download👉🏻 정상적으로설치되면 맥북상단에 ollama아이콘이 표시됩니다.
Once successfully installed, the ollama icon will be displayed at the top of the MacBook.

✔️ 터미널에서 아래의 명령어로도 확인 할 수 있습니다.
You can also check this using the following command in the terminal.
MacBookAir ~ % ollama --version

ollama version is 0.30.7
👉🏻 인공지능 모델인 gemma4:12b를 설치합니다.
Install the AI model gemma4:12b.
✔️ 터미널에서 아래의 명령어를 실행하면 gemma가 설치 됩니다.
You can install gemma by running the following command in the terminal.
ollama run gemma4:12b👉🏻 이제 VSCode에서 continue확장프로그램을 통해서 이 gemma를 연결합니다.
Now, connect this gemma in VSCode using the continue extension.
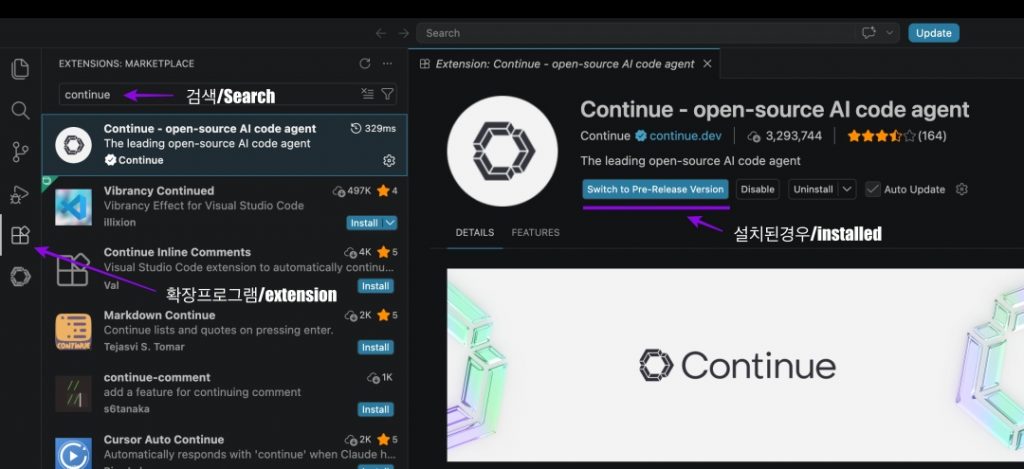
✔️ vscode에서 아래 사진처럼 확장프로그램을 설치합니다.
Install the extension in VS Code as shown in the picture below.
✔️ 아래 사진은 이미 설치된 경우입니다.
The photo below shows the case where it is already installed.
✔️ 설치전에 install을 클릭하면 Switch to Pre-Release Version로 바뀝니다.
If you click install before installation, it changes to Switch to Pre-Release Version.
✔️ gemma와 연결하기 위해서 config.yaml파일을 아래처럼 수정합니다.
To connect with gemma, modify the config.yaml file as follows.
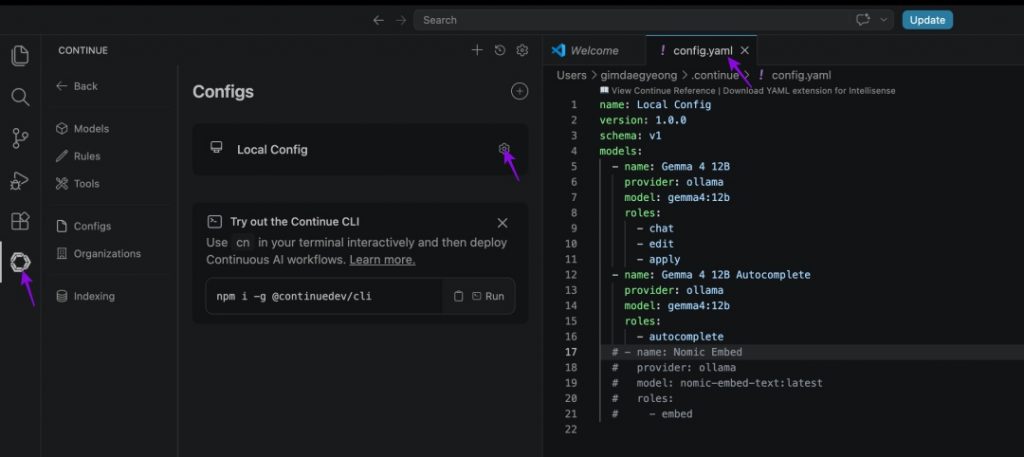
–config.yaml
name: Local Config
version: 1.0.0
schema: v1
models:
  - name: Gemma 4 12B
    provider: ollama
    model: gemma4:12b
    roles:
      - chat
      - edit
      - apply
  - name: Gemma 4 12B Autocomplete
    provider: ollama
    model: gemma4:12b
    roles:
      - autocomplete
  # - name: Nomic Embed
  #   provider: ollama
  #   model: nomic-embed-text:latest
  #   roles:
  #     - embed
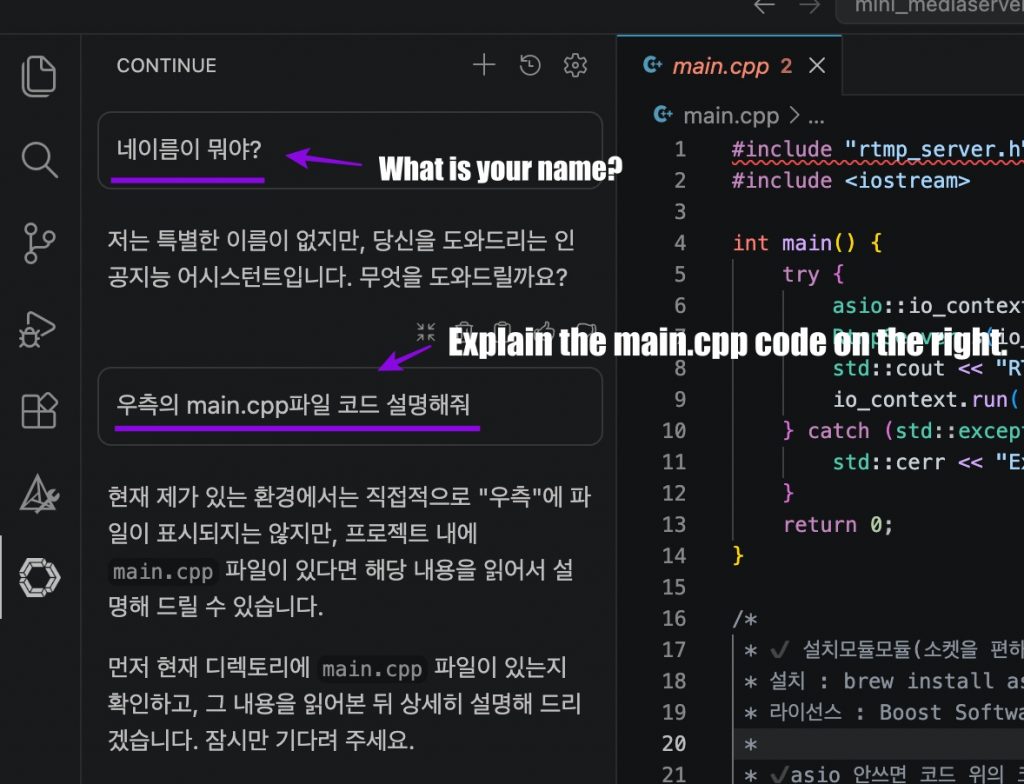
👉🏻 설정이 모두 끝났으면 아래처럼 사용할 수 있습니다.
Once the setup is complete, you can use it as shown below.