👉🏻 GET,POST 데이터 전송방식
GET,POST METHOD GET and POST Data Transmission Methods
👉🏻 nodejs에서 데이터 전송방식을 설명하는 자바스크립트 코드입니다.
This is JavaScript code that explains data transmission methods in Node.js.
👉🏻 MacOS에서 테스트했지만 대부분의 OS환경에서 동일하게 실행할 수 있습니다.
It was tested on macOS, but it can be run in the same way on most operating systems.
👉🏻 파일 / files
✔️ Project Root
html			package.json		server2.js
node_modules		public
package-lock.json	server.js
✔️ html,public
- html
index.html

- public
get1.ejs    post1.ejs.    view1.ejs
👉🏻 모듈 설치 / Module Installation
npm install body-parser
npm install ejs
npm install express
npm install path
👉🏻 전체 코드 / Full Code
✔️package.json
— 설치된 모듈정보입니다.
{
  "dependencies": {
    "body-parser": "^1.20.3",
    "ejs": "^3.1.10",
    "express": "^4.21.2",
    "path": "^0.12.7"
  }
}
✔️server.js
/*---------------------------------------------------------------------------

- NODEJS-4 : get method
- 2025.02.

---------------------------------------------------------------------------*/

// module : https://www.npmjs.com
const ejs = require('ejs');              // https://ejs.co
const path = require('path');            // https://nodejs.org/docs/latest/api/path.html
const express = require('express');      // https://expressjs.com/

const app = express();
const port = 3000;

// ejs
app.set('view engine','ejs');
app.set('views','./public');

// static directory
// app.use(express.static(path.join(__dirname, "public")));

/*---------------------------------------------------------------------------
  Start route
---------------------------------------------------------------------------*/

app.get('/', (req, res) => {
  //res.send('Hello, World!');
  res.sendFile(path.join(__dirname, "/html", "/index.html")); // html directory,index.html

  console.log("log:index1.html");
  console.log(`log: filename : ${__filename}`); // server.js
  console.log(`log: path:${__dirname}`); // directory path
});

app.get('/view1', (req, res) => {
  res.render('view1'); // ejs file
});

app.get('/get1', (req, res) => {
    const id = req.query.id;
    const name = req.query.name;

    console.log(`id: ${id}`)
    console.log(`name : ${name}`)
    res.render('get1',{fid: id,fname: name});
});


/*---------------------------------------------------------------------------
  Start Server
---------------------------------------------------------------------------*/

// Start the server
app.listen(port, () => {
  console.log(`Server listening at http://localhost:${port}`);
});
✔️server2.js
/*---------------------------------------------------------------------------

- NODEJS-4 : get,post method
- 2025.02.

---------------------------------------------------------------------------*/

// module : https://www.npmjs.com
var bodyParser = require('body-parser'); // POST,https://github.com/expressjs/body-parser#readme
const ejs = require('ejs');              // https://ejs.co
const path = require('path');            // https://nodejs.org/docs/latest/api/path.html
const express = require('express');      // https://expressjs.com/

const app = express();
const port = 3000;

// ejs
app.set('view engine','ejs');
app.set('views','./public');

// static directory
// app.use(express.static(path.join(__dirname, "public")));

// post method
app.use(express.urlencoded({ extended: true }));  // For form post method
app.use(express.json()); // For parsing JSON data

/*---------------------------------------------------------------------------
  Start route
---------------------------------------------------------------------------*/

app.get('/', (req, res) => {
  //res.send('Hello, World!');
  res.sendFile(path.join(__dirname, "/html", "/index.html"));

  console.log("log:index1.html");
  console.log(`log: filename : ${__filename}`); // server.js
  console.log(`log: path:${__dirname}`); // directory path
});

app.get('/view1', (req, res) => {
  res.render('view1'); // ejs file
});

app.get('/get1', (req, res) => {
    const id = req.query.id;
    console.log(`id: ${id}`)
    res.render('get1',{fid: id}); // ejs file
});

//---------------------------------------------------------------

app.get('/form', (req, res) => {
  res.send(`
      <form method="POST" action="/formProc">
          <label for="name">Name:</label>
          <input type="text" id="name" name="name"><br><br>

          <label for="email">Email:</label>
          <input type="email" id="email" name="email"><br><br>
          <button type="submit">Submit</button>
      </form>
  `);
});

app.post("/formProc", (req, res) => {

    const name = req.body.name;
    const email = req.body.email;

    console.log(`form name : ${name}`)
    console.log(`form email : ${email}`)
    res.render('post1',{fname: name,femail: email});
});

//---------------------------------------------------------------
app.get('/formapi', (req, res) => {
  res.send(`
      <form method="POST" action="/api">
          <label for="api">API</label><br><br>
          <label for="name">Name:</label>
          <input type="text" id="name" name="name"><br><br>

          <label for="email">Email:</label>
          <input type="email" id="email" name="email"><br><br>
          <button type="submit">Submit</button>
      </form>
  `);
});


app.post('/api', (req, res) => {
  console.log("Received JSON data:", req.body);

  res.json({ message: "Data received successfully!", data: req.body }); // Send JSON response
});


/*---------------------------------------------------------------------------
  Start Server
---------------------------------------------------------------------------*/

// Start the server
app.listen(port, () => {
  console.log(`Server listening at http://localhost:${port}`);
});
✔️ /html/index.html
<h3>index.html</h3>✔️ /public/get1.ejs
<h3>get1.ejs</h3><br>
<h3>fid:<%=fid%></h3><br>
<h3>fname:<%=fname%></h3>
✔️ /public/post1.ejs
<h3>post1.ejs</h3><br>
<h3>name : <%=fname%></h3><br>
<h3>email : <%=femail%></h3>
✔️ /public/view1.ejs
<h3>view1.ejs</h3>👉🏻실행 / Run
✔️ 터미널 / Terminal
— 터미널을 열고 아래처럼 server.js나 server2.js를 실행할 수 있습니다.
You can open a terminal and run server.js or server2.js as shown below.
# server.js실행
# Run server.js
node server.js

# server2.js실행
# Run server2.js
node server.js
✔️ 브라우저 / Browser
— 서버 실행후 브라우저를 열고 다음 처럼 주소를 입력합니다.
After starting the server, open your browser and enter the address as follows.
http://localhost:3000— 주소 뒤에 라우터를 붙여서 테스트 할 수 있습니다.
You can test it by appending “/router” to the address.
http://localhost:3000/view1👉🏻 코드 설명 / Code Explanation
✔️ server.js와 server2.js파일은 서버 파일입니다.
The server.js and server2.js files are server files.
✔️ server.js
— server.js파일은 브라우저에서 간단한 get방식 메소드를 테스트 할 수 있는 서버입니다.
The server.js file is a server that allows you to test simple GET requests from a browser.
— server.js에는 ‘/’,’view1′,’get1’라우트가 있습니다.
server.js contains the routes ‘/’, ‘view1’, and ‘get1’.
app.get("/", (req, res) => { ... }
app.get("/view1", (req, res) => { ... }
app.get("/get1", (req, res) => { ... }
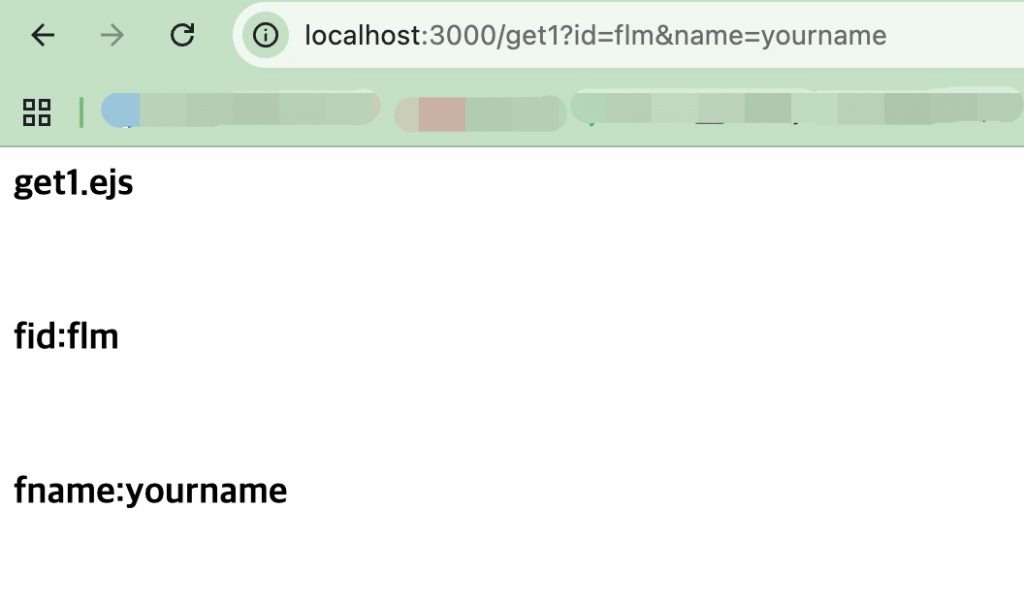
— 간단한 예로 get1라우터를 테스트하면 아래처럼 브라우저와 터미널에 표시됩니다.
As a simple example, if you test the get1 router, the output appears in the browser and terminal as shown below.
1) 터미널 / Terminal

2)브라우저 / Browser
✔️ server2.js
— 실행방법은 server.js와 같습니다.
The method for running it is the same as for server.js.
— server2.js에는 server1.js에 다음과 같은 라우트가 더 추가되어 있습니다.
server2.js includes additional routes compared to server1.js, as shown below.
app.get("/form", (req, res) => { ... }
app.post("/formProc", (req, res) => { ... }
app.get("/formapi", (req, res) => { ... }
app.post("/api", (req, res) => { ... }
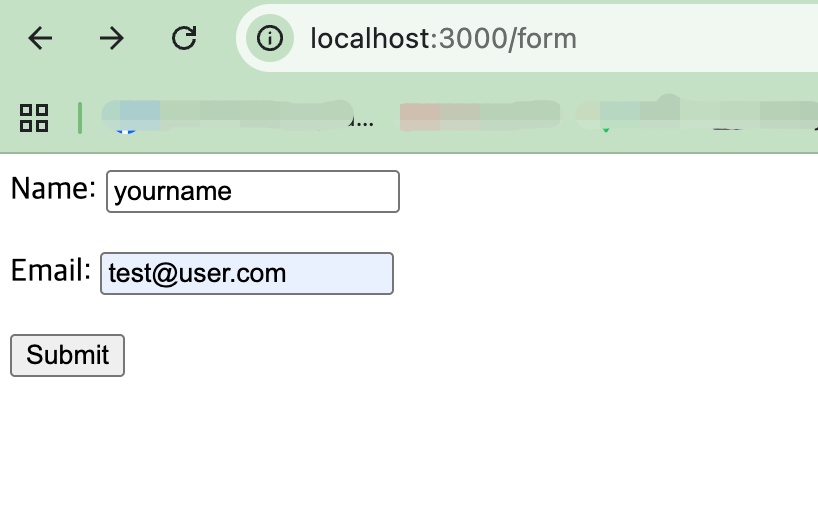
1) /form 라우트는 post 전송방식으로 formProc에 데이터를 전송하고 브라우저와 터미널에 전송정보를 출력합니다.
The /form route transmits data to formProc using the POST method and outputs the transmission information to both the browser and the terminal.
2)/formapi라우트는 post전송방식으로 api에 데이터를 전송하고 브라우저와 터미널에 전송정보를 json데이터로 출력합니다.
The /formapi route transmits data to the API using the POST method and outputs the transmission details as JSON data to both the browser and the terminal.
— 브라우저에서 ‘from’라우트를 실행합니다.
Execute the ‘from’ route in the browser.
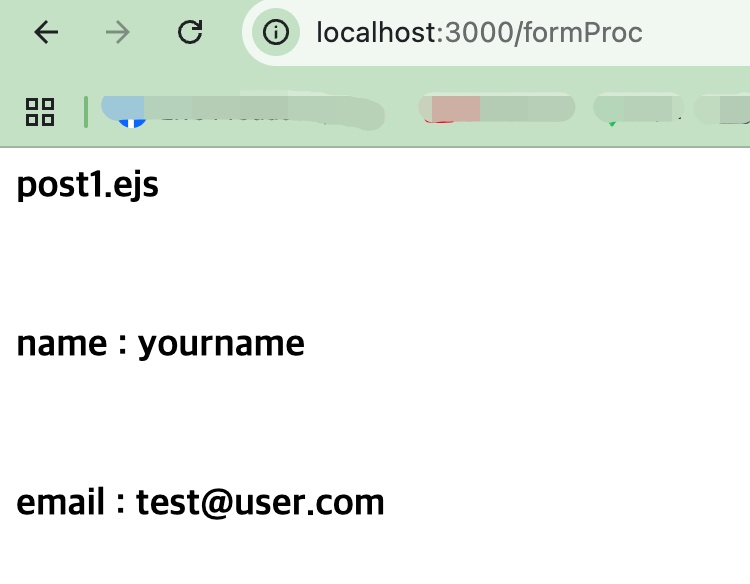
— submit버튼을 누르면 form proc화면에서 전송정보가 표시됩니다.
When you click the submit button, the transmitted information is displayed on the form processing screen.
— 터미널에는 아래처럼 표시됩니다.
It is displayed in the terminal as shown below.
Server listening at http://localhost:3000
form name : yourname
form email : test@user.com
form name : yourname
form email : test@user.com
Received JSON data: { name: 'yourname', email: 'test@user.com' }
✔️ ejs 파일 호출 / Calling an EJS file
— server.js나 server2.js에서 아래와 같은 코드는 ejs파일을 호출하는 코드입니다.
In server.js or server2.js, code like the following is used to call an EJS file.
res.render("view1"); // ejs file— public 디렉토리 안에 ejs파일이 있습니다.
There is an EJS file inside the public directory.
- public
get1.ejs    post1.ejs.    view1.ejs
— ejs파일에 값이나 변수를 입력할때는 다음처럼 ejs파일을 호출합니다.
When passing values or variables to an EJS file, you call the EJS file as follows.
res.render("post1", { fname: name, femail: email });— 서버에서 주입된 변수를 ejs파일에서는 아래처럼 표현합니다.
Variables injected from the server are represented in EJS files as shown below.
<h3>post1.ejs</h3><br>
<h3>name : <%=fname%></h3><br>
<h3>email : <%=femail%></h3>
1)이런 방식은 기존의 서버사이드 스크립트(php, asp,jsp)에서 사용하는 방식과 매우 유사합니다.
This approach is very similar to the methods used in traditional server-side scripting (PHP, ASP, JSP).
✔️ html파일 호출
Call an HTML file
— html파일을 html 디렉토리 내에 있습니다.
The HTML file is located in the html directory.
- html
index.html
— server.js나 server2.js에서 아래의 코드로 호출 합니다.
Call it using the code below in server.js or server2.js.
res.sendFile(path.join(__dirname, "/html", "/index.html"));1) 위의 코드는 html 디렉토리 내의 index.html파일을 호출 하는 코드입니다.
The code above calls the index.html file located in the html directory.


