👉🏻 Git 기반으로 소스코드를 가볍게 관리 할 수 있습니다.
You can manage source code lightweightly using Git.
👉🏻 사용방법은 깃허브와 동일합니다.
The usage is the same as on GitHub.
👉🏻 아래의 모든 설치과정은 xubuntu에서 진행했습니다.
All installation steps below were performed on Xubuntu.
📁 설치 / install
✔️ 도커와 도커 컴포즈가 없다면 설치합니다.
If you do not have Docker and Docker Compose installed, install them.
sudo apt update
sudo apt install docker.io docker-compose-v2 -y
✔️ 파일작성
File Creation
mkdir ~/gitea && cd ~/gitea
nano docker-compose.yml
— docker-compose.yaml
version: "3"

networks:
  gitea:
    external: false

services:
  server:
    image: gitea/gitea:latest
    container_name: gitea
    environment:
      - USER_UID=1000
      - USER_GID=1000
    restart: always
    networks:
      - gitea
    volumes:
      - ./data:/data
      - /etc/timezone:/etc/timezone:ro
      - /etc/localtime:/etc/localtime:ro
    ports:
      - "3000:3000"
      - "2222:22"
✔️ 도커 컴포즈 실행
Run Docker Compose
sudo docker compose up -d ✔️ http://localhost:3000 으로 접속
Access http://localhost:3000
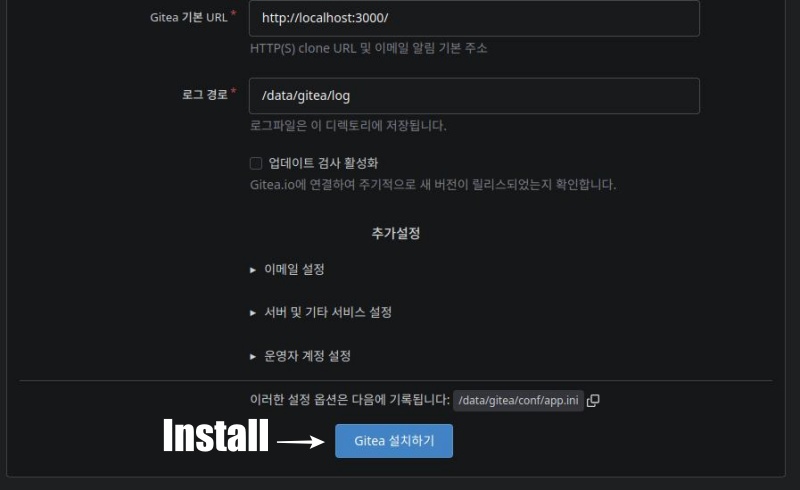
— 기본 값으로 두고 Gitea 설치하기 버튼을 클릭합니다.
Leave the settings at their default values and click the “Install Gitea” button.
— 회원가입까지 완료하면 다음과 같은 화면을 볼 수 있습니다.
Once you complete the sign-up process, you will see a screen like the following.
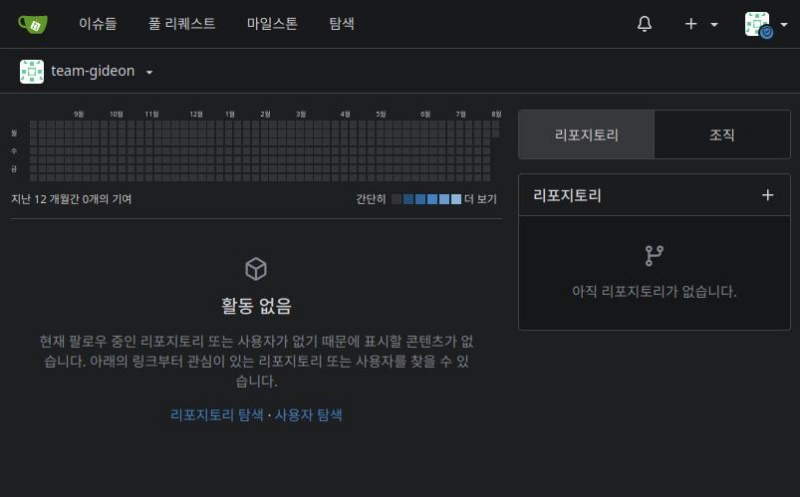
— 우측의 +를 눌러서 레포지토리를 추가하고 코드를 업로드해봅니다.
Click the “+” on the right to add a repository and upload your code.
touch README.md
git init
git checkout -b main
git add README.md
git commit -m "first commit"
git remote add origin http://192.168.0.101:5080/team-gideon/flm-nextjs.git
git push -u origin main
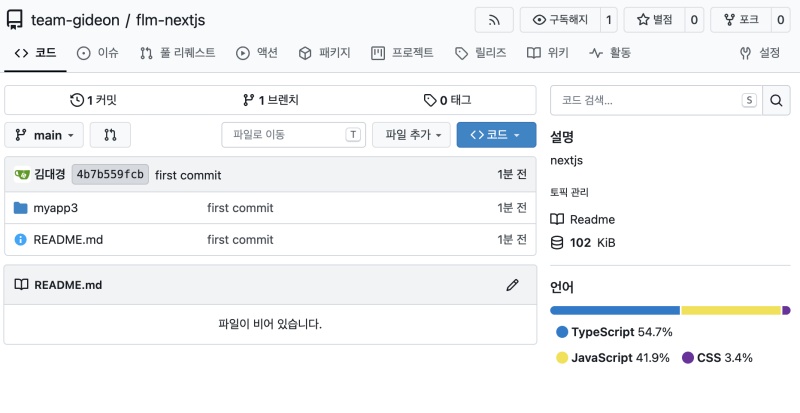
— 코드가 업로드된 화면을 볼 수 있습니다.
You can see the screen where the code has been uploaded.
📁나중에 gitea를 이전하거나 백업할 경우 도커 컴포즈 yaml파일이 있는 gitea디렉토리만 백업해서 옮기면됩니다.
If you need to migrate or back up Gitea later, you simply need to back up and move the Gitea directory containing the Docker Compose YAML file.


