✅ 코드 다운로드 / Code Download
https://github.com/gideonslife01/flm-js-nodejs
🌐 이 앱은 로그인과 소켓메세지 발송기능이 있습니다.(웹,모바일 앱[리액트네이티브])
This app has login and socket message sending functions. (Web, mobile app [React Native])
🌐 SockeetMessage는 리액트네이티브입니다. 프로젝트를 새롭게 생성해서 사용하세요
SocketMessage is for React Native. Please create a new project to use it.
🌐1.디렉토리/Directory
1)nodejs+socketMessage/ReactNativeApp/ : 리액트네이티브 / ReactNative
— 파일 및 디렉토리
android index.js ios package.json src— src 디렉토리
src : 앱 소스코드/App souce code
- files : MainScreen.js,LoginScreen.js,index.js

- MainScreen.js,LoginScreen.js,index.js는 기존 로그인 파일과 동일합니다.
MainScreen.js, LoginScreen.js, and index.js are the same as the existing login files.

- SocketMessage.js는 소켓메세지 수신 및 발송 클라이언트입니다.
SocketMessage.js is a socket message receiving and sending client.
— ios 디렉토리 / ios direactory
ios : ios설정파일로 http허용설정파일이 있습니다. / There is an iOS configuration file for allowing HTTP connections.
- info.plist
— android 디렉토리 / android directory
android : Android SDk위치가 있습니다. / There is an Android SDK location.
- local.properties
2)nodejs+socketMessage/login+socketmessage : Nodejs
— 파일 및 디렉토리 / files and directory
node_modules		package.json		server.js
package-lock.json	public
— public : ejs 파일 / ejs files
login.ejs SocketMessage.ejs— server.js : 서버 실행파일입니다. / This is the server executable file.
🌐2.리액트네이티브설치 / ReactNative Install
1)프로젝트 생성 : Project creation
https://reactnative.dev/docs/getting-started-without-a-framework
– 다음 명령어로 프로젝트를 생성합니다. / Create a project with the following command.
npx @react-native-community/cli@latest init Your Project name— 모듈설치 / modules install
✔️package.json파일에서 아래 부분의 모듈을 볼 수 있습니다.
You can see the modules in the following section in the package.json file.
✔️npm install @react-native-async-storage/async-storage 이렇게 설치 하시면 됩니다.
You can install it like this: npm install @react-native-async-storage/async-storage.
  "dependencies": {
    "@react-native-async-storage/async-storage": "^2.1.2",
    "@react-navigation/native": "^7.1.8",
    "@react-navigation/stack": "^7.3.1",
    "react": "19.0.0",
    "react-native": "0.79.2",
    "react-native-gesture-handler": "^2.25.0",
    "react-native-safe-area-context": "^5.4.0",
    "react-native-screens": "^4.10.0",
    "socket.io-client": "^4.8.1"
  },
npm install @react-native-async-storage/async-storage@latest
npm install @react-navigation/native@latest
npm install @react-navigation/stack@latest
npm install react-native-gesture-handler@latest
npm install react-native-safe-area-context@latest
npm install react-native-screens@latest
npm install socket.io-client@latest2)안드로이드설정 / android settings
–📓 이 부분은 오류 발생시에만 적용합니다.
This part applies only when an error occurs.
— sdk location설정 / sdk location settings
project/android/locals.properties파일이 없으면 생성
— locals.properties파일에 안드로이드 sdk위치를 입력 / Enter the Android SDK location in the locals.properties file
※sdk위치는 안드로이드 스튜디오 메뉴의 settings->Language & Frameworks->Android SDK->Android SDK Location에서 확인 가능
You can check the SDK location in the Android Studio menu: settings->Language & Frameworks->Android SDK->Android SDK Location
sdk.dir=/Users/gimdaegyeong/Library/Android/sdk
3)IOS 설정 / IOS Settings
— 모듈을 설치하면 반드시 ios디렉토리에 들어가서 ‘pod install’명령을 실행합니다.
After installing the module, be sure to navigate to the ios directory and run the pod install command.
— pod install 명령을 실행하지 않으면 ios앱에 모듈이 적용되지 않습니다.
If you do not run the pod install command, the module will not be applied to the iOS app.
– https가 아닌 http프로토콜을 사용하기 때문에 http프로토콜 허용 설정을 해야합니다.
Since we are using the http protocol instead of https, we need to allow the http protocol.
— info.plist파일을 수정합니다.
– 파일위치 / file location : project/ios/project name directory/info.plist
— 클라우드/호스팅 서버를 사용하는 경우에는 ipaddress나 도메인을 사용하시면 됩니다.
If you are using a cloud/hosting server, you can use ipaddress or domain.
<?xml version="1.0" encoding="UTF-8"?>
<!DOCTYPE plist PUBLIC "-//Apple//DTD PLIST 1.0//EN" "http://www.apple.com/DTDs/PropertyList-1.0.dtd">
<plist version="1.0">
<dict>
	<key>CFBundleDevelopmentRegion</key>
	<string>en</string>
	<key>CFBundleDisplayName</key>
	<string>SocketMessage</string>
	<key>CFBundleExecutable</key>
	<string>$(EXECUTABLE_NAME)</string>
	<key>CFBundleIdentifier</key>
	<string>$(PRODUCT_BUNDLE_IDENTIFIER)</string>
	<key>CFBundleInfoDictionaryVersion</key>
	<string>6.0</string>
	<key>CFBundleName</key>
	<string>$(PRODUCT_NAME)</string>
	<key>CFBundlePackageType</key>
	<string>APPL</string>
	<key>CFBundleShortVersionString</key>
	<string>$(MARKETING_VERSION)</string>
	<key>CFBundleSignature</key>
	<string>????</string>
	<key>CFBundleVersion</key>
	<string>$(CURRENT_PROJECT_VERSION)</string>
	<key>LSRequiresIPhoneOS</key>
	<true/>

<!--http허용을 위한 보안설정-->
<key>NSAppTransportSecurity</key>
<dict>
    <key>NSAllowsArbitraryLoads</key>
    <false/>
    <key>NSExceptionDomains</key>
    <dict>

        <key>192.168.0.10</key>
        <dict>
            <key>NSExceptionAllowsInsecureHTTPLoads</key>
            <true/>
            <key>NSExceptionRequiresForwardSecrecy</key>
            <false/>
            <key>NSIncludesSubdomains</key>
            <false/>
        </dict>

    </dict>
</dict>
<!--// http허용을 위한 보안설정-->


	<key>NSLocationWhenInUseUsageDescription</key>
	<string></string>
	<key>UILaunchStoryboardName</key>
	<string>LaunchScreen</string>
	<key>UIRequiredDeviceCapabilities</key>
	<array>
		<string>arm64</string>
	</array>
	<key>UISupportedInterfaceOrientations</key>
	<array>
		<string>UIInterfaceOrientationPortrait</string>
		<string>UIInterfaceOrientationLandscapeLeft</string>
		<string>UIInterfaceOrientationLandscapeRight</string>
	</array>
	<key>UIViewControllerBasedStatusBarAppearance</key>
	<false/>
</dict>
</plist>
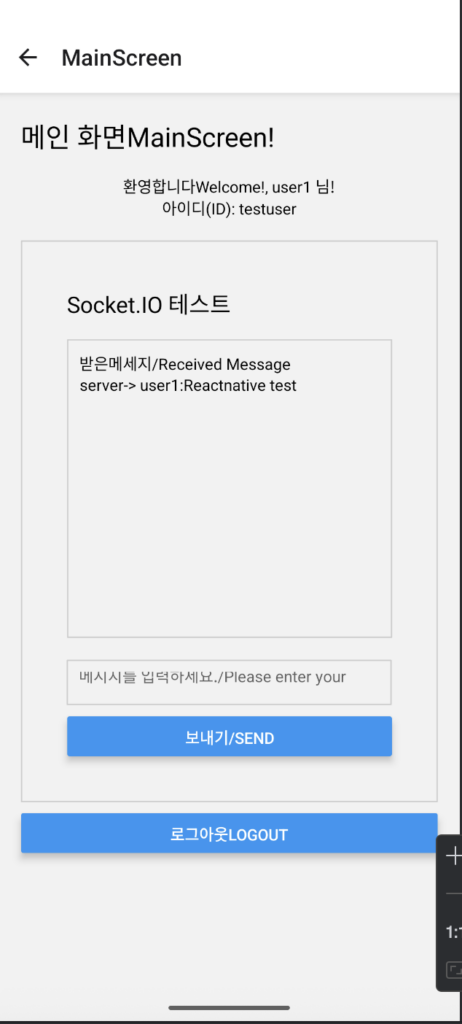
4)실행/Run
– npm install android 또는 npm install ios명령어로 실행 할 수 있습니다.
You can run it with the command npm install android or npm install ios.

3.NODEJS설치 / NODEJS install
1)소스코드 다운 받기
– 위의 구글 드라이브에서 nodejs+socketMessage/login+socketmessage 디렉토리를 다운 받습니다.
2)모듈설치 / module install
— 먼저 npm init명령어로 package.json파일을 생성합니다.
First, create a package.json file using the npm init command.
-package.json파일에서 아래 부분의 모듈을 볼 수 있습니다.
You can see the modules in the following section in the package.json file.
  "dependencies": {
    "bcrypt": "^5.1.1",
    "express": "^5.1.0",
    "express-session": "^1.18.1",
    "http": "^0.0.1-security",
    "socket.io": "^4.8.1"
  }
– npm install 명령어로 모듈을 설치 합니다. / Install the module using the npm install command.
npm install express express-session bcrypt http socket.io --save3)실행 / run
— node server.js로 nodejs서버를 시작합니다.
Start the Node.js server with node server.js.
4)브라우저에서 http://localhost:3000을 실행하면 다음과 같은 화면을 볼 수 있습니다.
If you run http://localhost:3000 in your browser, you will see a screen like the following.

※ 로그인 ID는 testuser,testuser2이며 패스워드는 모두 11111111입니다.
The login ID is testuser,testuser2 and the password is 11111111.


