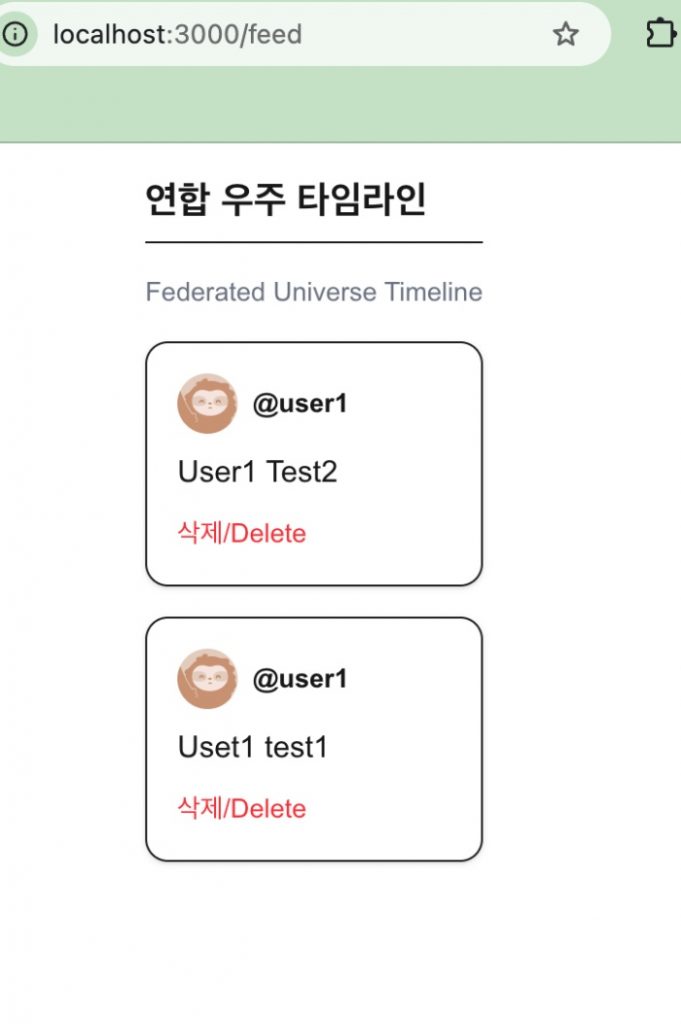
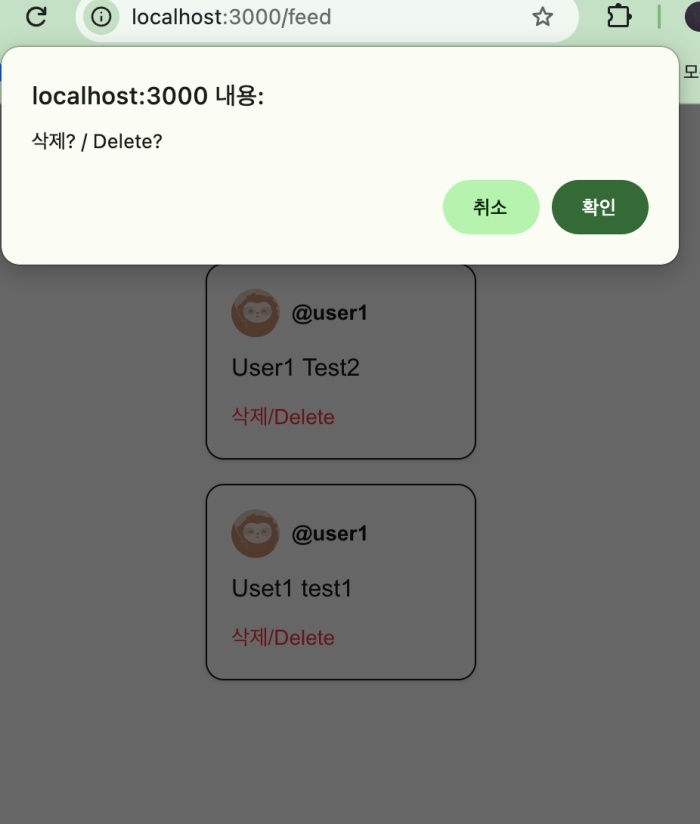
👉🏻 gotosocial은 글쓰기 UI를 지원되지 않습니다.
GoToSocial does not support a post-writing UI.
👉🏻 그래서 글을 작성하고 수정하고 삭제하기위해서는 별도의 앱이나 웹사이트를 이용해야 합니다.
Therefore, you need to use a separate app or website to create, edit, and delete posts.
👉🏻 Tusky(모바일)나 Pinafore(웹사이트)등을 이용하면 글을 작성할 수 있습니다.
You can write posts using apps like Tusky(mobile) or Pinafore.(website)
👉🏻 여기서는 nextjs의 gotosocial서버의 nextauth인증과 서버의 글을 읽고 삭제하는 기능에 대해서 살펴 봅니다.
Here, we examine NextAuth authentication for the GoToSocial server within a Next.js application, as well as the functionality for reading and deleting posts on the server.
📁 프로젝트 구조 / Project Structure
myapp9/
├─ auth.ts                               <- 인증 설정 / Authentication Settings
├─ app/api/auth/[...nextauth]/route.ts   <- 인증 실행 / Authentication Settings
├─ lib/gotosocial.ts                     <- 타임 라인 읽기 / Read Timeline
├─ app/api/gts/statuses/[id]/route.ts.   <- 글 삭제 / Delete Post
└─ app/feed/page.tsx                     <- UI
📁 Nextjs 프로젝트 생성
Create a Next.js project
npx create-next-app@latest📁 next-auth 설치
Install next-auth
npm install next-auth@beta.📁 env.local 파일 생성
Create an .env.local file.
# .env.local

# GTS_BASE_URL=https://freelifemakers.com
NEXT_PUBLIC_GTS_BASE_URL=https://freelifemakers.com
GTS_URL="https://freelifemakers.com"

# GTS ID,Secret
AUTH_GOTOSOCIAL_ID=""
AUTH_GOTOSOCIAL_SECRET=""

# npx auth secret  or openssl rand -base64 32 로 생성
AUTH_SECRET=
AUTH_URL="http://localhost:3000"
📁 앱 등록해서 ID/Secret 받기(터미널에서 실행)
Register the app to obtain the ID/Secret (run in the terminal)
✔️ client_id, client_secret를 .env.local의 AUTH_GOTOSOIAL_ID와 AUTH_GOTOSOCIAL_SECRET에 입력합니다.
curl -X POST https://freelifemakers.com/api/v1/apps \
  -H "Content-Type: application/json" \
  -d '{
    "client_name": "freelife-local-dev",
    "redirect_uris": "http://localhost:3000/api/auth/callback/gotosocial",
    "scopes": "read write follow push",
    "website": "http://localhost:3000"
  }'
1)http://localhost:3000에서 실행하기 때문에 AUTH_URL=”http://localhost:3000″이 됩니다.
Since it runs on http://localhost:3000, AUTH_URL becomes “http://localhost:3000”.
2)AUTH_SECRET은 npmx auth secret로 터미널에서 생성 할 수 있습니다.
You can generate AUTH_SECRET in the terminal using npmx auth secret.
📁 로그인 , 콜백 API (핵심)
Login , Callback API (Core)
— app/api/auth/[...nextauth]/route.ts
// app/api/auth/[...nextauth]/route.ts
import { handlers } from "@/auth"
export const { GET, POST } = handlers
— myapp9/auth.ts
// auth.ts (프로젝트 루트에 생성)
// auth.ts (Created in the project root)
import NextAuth from "next-auth"

export const { handlers, auth, signIn, signOut } = NextAuth({
  providers: [
    {
      id: "gotosocial",
      name: "freelifemakers",
      type: "oauth",
      authorization: {
        url: "https://freelifemakers.com/oauth/authorize",
        params: { scope: "read write follow push" }
      },
      token: "https://freelifemakers.com/oauth/token",
      userinfo: "https://freelifemakers.com/api/v1/accounts/verify_credentials",

      // .env.local과 변수명 일치시키기
      // Match with variable names in .env.local
      clientId: process.env.AUTH_GOTOSOCIAL_ID,
      clientSecret: process.env.AUTH_GOTOSOCIAL_SECRET,

      // GTS 토큰 발급 에러(400 Bad Request) 해결 절대 조건
      // Essential condition to resolve GTS token issuance error (400 Bad Request)
      client: {
        token_endpoint_auth_method: "client_secret_post",
      },
      profile(profile: any) {
        return {
          id: profile.id,
          name: profile.display_name || profile.username,
          image: profile.avatar,
          email: profile.acct.includes('@') ? profile.acct : `${profile.acct}@freelifemakers.com`,
        }
      },
    }
  ],
  callbacks: {
    async jwt({ token, account }: any) {
      if (account) token.accessToken = account.access_token
      return token
    },
    async session({ session, token }: any) {
      session.accessToken = token.accessToken
      return session
    }
  }
})
📁 GoToSocial 클라이언트 파일
GoToSocial client files
✔️ lib/gotosocial.ts 만들기 / Create lib/gotosocial.ts
— project/lib/gotosocial.ts
export const GTS_BASE = process.env.GTS_URL!

// 세션에서 꺼낸 accessToken으로 타임라인 가져오기
// etrieve the timeline using the accessToken obtained from the session
export async function getHomeTimeline(accessToken: string) {
  const res = await fetch(`${GTS_BASE}/api/v1/timelines/home`, {
    headers: { Authorization: `Bearer ${accessToken}` }
  })
  return res.json()
}
1) myapp9/app/fee/page.tsx에서 호출합니다.
It is called from myapp9/app/fee/page.tsx.
📁 프론트엔드 / Frontend
— 서버의 기능과 클라이언트의 기능은 같은 페이지에 코드를 작성 할 수 없습니다.
You cannot write server-side and client-side code on the same page.
— 그래서 코드를 page.tsx와 PostCard.tsx로 분리합니다.
So, I am splitting the code into page.tsx and PostCard.tsx.
✔️ myapp9/app/feed/page.tsx
// app/feed/page.tsx
import { auth } from "@/auth"
import { getHomeTimeline } from "@/lib/gotosocial" // /lib/gotosocial.ts
import { PostCard } from './PostCard' // Post,Delete Card Component


export default async function Feed() {
  // NextAuth v5 전용 세션 추출
  // Extract session for NextAuth v5
  const session = await auth()

  // 토큰이 세션에 안전하게 들어왔는지 검증
  // Verify if the token has been safely retrieved in the session
  if (!session?.accessToken) {
    return (
      <div className="p-10 text-center">
        <p className="text-red-500 font-semibold mb-2">인증 토큰을 찾을 수 없습니다. / Unable to find authentication token.</p>
        <a href="/api/auth/signin" className="text-blue-500 underline">로그인 페이지로 이동 / Go to login page</a>
      </div>
    )
  }


  try {

    // /lib/gotosocial.ts의 getHomeTimeline() 함수 사용
    // Use the getHomeTimeline() function from /lib/gotosocial.ts
    const posts = await getHomeTimeline(session.accessToken)

    return (
      <div className="max-w-xl mx-auto p-4 space-y-4">
        <h1 className="text-xl font-bold border-b pb-2">연합 우주 타임라인</h1>
        <h1 className="text-sm text-gray-500"> Federated Universe Timeline </h1>
        {posts.length === 0 ? (
          <p className="text-gray-500 py-10 text-center">아직 타임라인에 표시할 글이 없습니다. / No posts to display yet.</p>
        ) : (
          posts.map((p: any) => <PostCard key={p.id} post={p} token={session.accessToken} />)
        )}
      </div>
    )
  } catch (error) {
    console.error("피드 로딩 중 치명적 에러 / Fatal error while loading feed:", error);
    return <div className="p-10 text-red-500">GTS 백엔드 서버와 통신하는 중 문제가 발생했습니다. / Error occurred while communicating with GTS backend.</div>
  }
}

// signout  : http://localhost:3000/api/auth/signout
// signin  : http://localhost:3000/api/auth/signin
✔️ myapp9/app/feed/PostCard.tsx
// app/feed/PostCard.tsx
'use client'
import { deleteStatus } from '@/lib/gotosocial'

export function PostCard({ post, token }: { post: any, token: string }) {
  return (
    <div className="border rounded-xl p-4 bg-white shadow-sm space-y-2">
      <div className="flex items-center space-x-2">
        <img src={post.account.avatar} className="w-8 h-8 rounded-full" />
        <span className="font-bold text-sm">@{post.account.acct}</span>
      </div>
      <div dangerouslySetInnerHTML={{ __html: post.content }} />

      <button
        onClick={async () => {
          if(!confirm('삭제?')) return
          await fetch(`/api/gts/statuses/${post.id}`, { method: 'DELETE' })
          location.reload()
        }}
        className="text-red-500 text-sm"
      >
        삭제/Delete
      </button>
    </div>
  )
}
📁 글 삭제 / Delete Post
— myapp9/api/gts/statuses/[id]/route.ts
// app/api/gts/statuses/[id]/route.ts
import { auth } from "@/auth"

// 삭제 / Delete
export async function DELETE(req: Request, { params }: { params: Promise<{ id: string }> }) {
  const { id } = await params
  const session = await auth()
  if (!session?.accessToken) return new Response("Unauthorized", { status: 401 })

  const baseUrl = process.env.GTS_URL || "https://freelifemakers.com"
  const res = await fetch(`${baseUrl}/api/v1/statuses/${id}`, {
    method: 'DELETE',
    headers: { Authorization: `Bearer ${session.accessToken}` }
  })

  return new Response(null, { status: res.status })
}
1)글 삭제 부분 라우터를 따로 만든 이유는 서버의 CORS에러 때문입니다.
I created a separate router for the post deletion functionality due to a server-side CORS error.
2)gotosocial.ts에 글삭제 함수가 있는 경우 PostCard.tsx에서 호출하면 PostCard.tsx가 브라우저가 되기 떄문에 서버에서 차단합니다.
If the post deletion function is located in gotosocial.ts and called from PostCard.tsx, the server will block the request because PostCard.tsx acts as the client (browser).
3)서버와 서버끼리는 CORS문제가 없습니다.
There are no CORS issues between servers.
4) 그래서 PostCard.tsx가 실행한 라우트에서 gotosocial서버에 삭제요청을 합니다.
Therefore, the route executed by PostCard.tsx sends a deletion request to the GoToSocial server.
📁 실행 / Start Server
npm run dev📁 브라우저 접속 / Access Browser
http://localhost:3000/feed