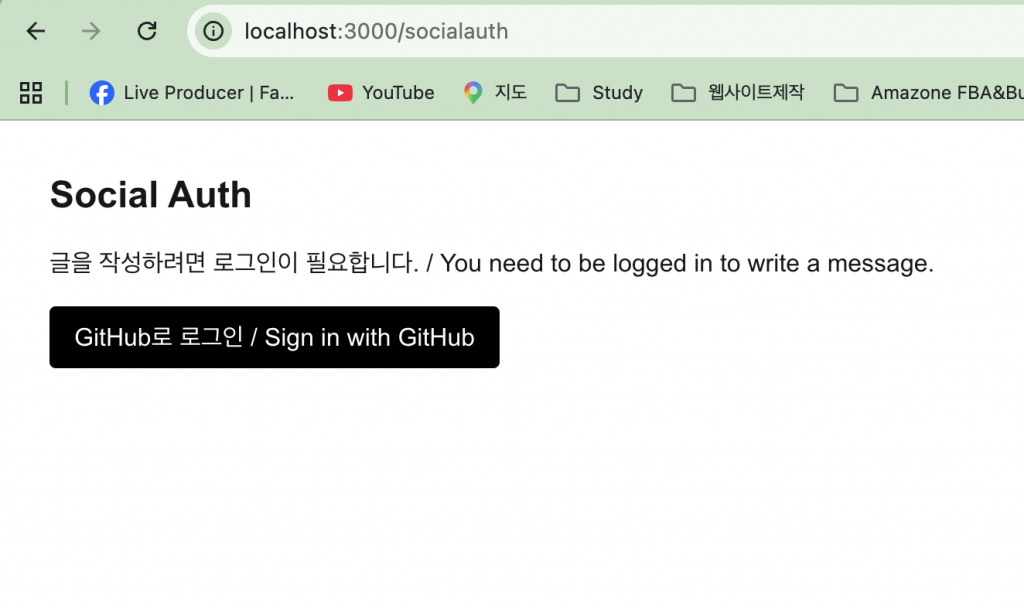
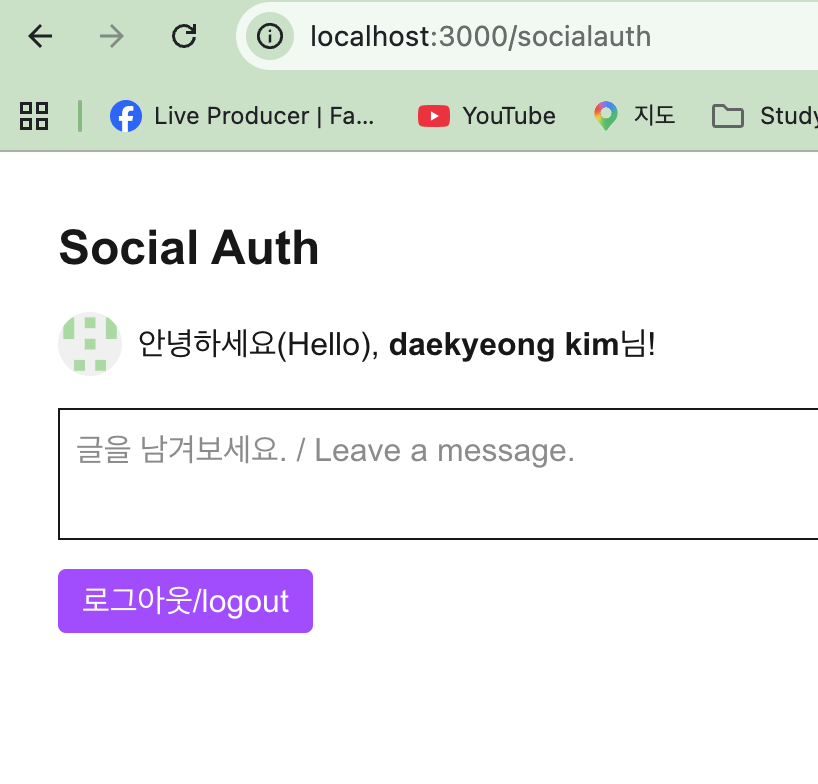
👉🏻 아래의 설명은 깃허브 웹사이트 가입정보를 이용해서 소셜로그인을 구현하는 설명입니다.
The following explanation describes how to implement social login using GitHub account credentials.
👉🏻 next-auth 패키지로 간단히 소셜 로그인을 구현할 수 있습니다.
You can easily implement social login using the next-auth package.
📁 전체 디렉토리 구조
Overall directory structure
myapp5/
├── .env.local                   # GitHub ID, Secret,AUTH_SECRET
├── auth.ts                      # Auth.ts for github
├── package.json
├── tsconfig.json
│
└── app/
    ├── layout.tsx
    ├── globals.css
    ├── page.tsx                 # Main Page(http://localhost:3000)
    │
    ├── api/                     # Back-end
    │   └── auth/                # auth
    │       └── [...nextauth]/   # Catch-all
    │             └── route.ts   # GET, POST handlers
    │
    └── socialauth/
        └── page.tsx             # Login

(http://localhost:3000/socialauth)
📁 프로젝트설치 / Project Installation(myapp5)
npx create-next-app@latest📁 NextAuth 패키지 설치
Install the NextAuth package
npm install next-auth@beta📁 깃허브에 앱등록
Register app on GitHub
https://github.com/settings/developers
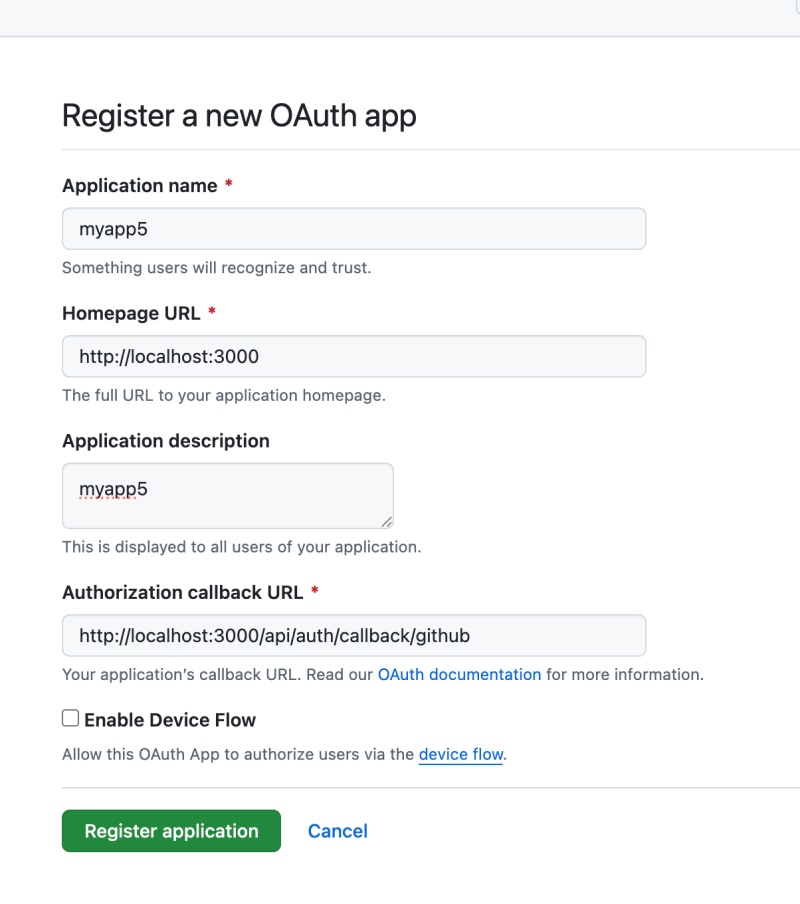
— 깃허브 페이지에 아래와 같이 동일하게 주소를 입력합니다.
Enter the address on the GitHub Pages site exactly as shown below.
Homepage URL: http://localhost:3000
Authorization callback URL: http://localhost:3000/api/auth/callback/github
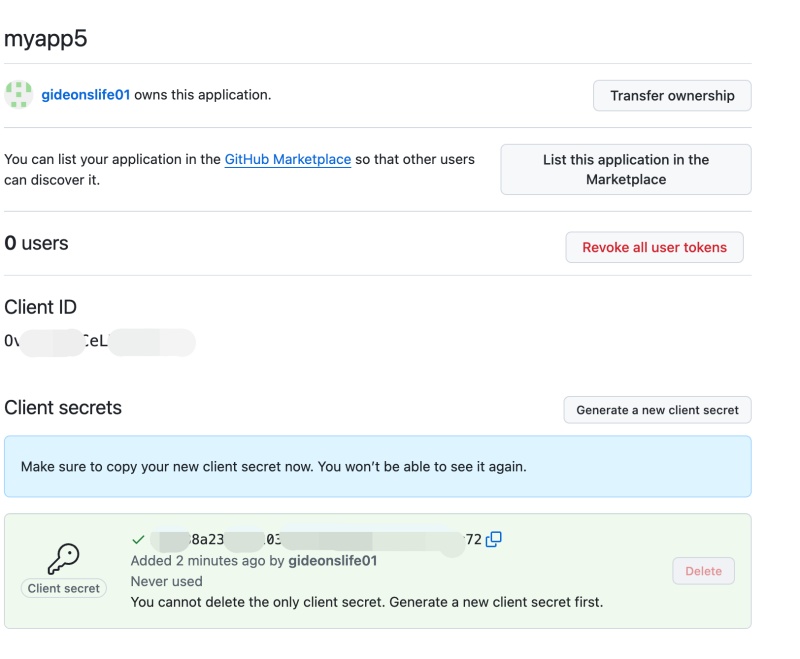
1)ClientID와 Client Secret을 저장해 둡니다.(1회만 노출)
Save the Client ID and Client Secret (they are displayed only once).
📁 auth.ts파일 생성
Create the auth.ts file.
— project/app/auth.ts
// auth.ts
import NextAuth from "next-auth"
import GitHub from "next-auth/providers/github"

export const { handlers, auth, signIn, signOut } = NextAuth({
  providers: [
    GitHub({
      clientId: process.env.AUTH_GITHUB_ID,
      clientSecret: process.env.AUTH_GITHUB_SECRET,
    }),
  ],
})
📁 환경변수 파일 생성(.env.local)
Create environment variable file (.env.local)
# .env.local
AUTH_SECRET="랜덤 문자열 키/Random string key"
AUTH_GITHUB_ID="깃허브에서 발급받은 Client ID/Client ID issued by GitHub"
AUTH_GITHUB_SECRET="깃허브에서 발급받은 Client Secret/Client Secret issued by GitHub"
1)AUTH_SECRET
터미널에 npx auth secret을 입력하면 무작위 문자열이 자동 생성됩니다.
Entering npx auth secret in the terminal automatically generates a random string.
2)생성된 문자열을 AUTH_SECRET에 붙여 넣습니다.
Paste the generated string into AUTH_SECRET.
📁 API라우터 핸들러 작성
Writing API Router Handlers
— route.ts
// app/api/auth/[...nextauth]/route.ts
//import { handlers } from "@/auth"
import { handlers } from "../../../auth"
export const { GET, POST } = handlers
1)route.ts 파일의 위치는 다음과 같습니다. app/api/auth/[…nextauth]/route.ts
The location of the route.ts file is as follows: app/api/auth/[…nextauth]/route.ts
2)깃허브인증시 콜백 url은 다음과 같습니다.
The callback URL for GitHub authentication is as follows:
http://localhost:3000/api/auth/callback/github3) 콜백 url을 통해서 발급받은 키를 확인하게 됩니다.
You will verify the issued key via the callback URL.
4)이 때 […nextauth] 아래에 route.ts를 만들어 두면 /api/auth 로들어오는 요청은 모두 route.ts에서 처리하게됩니다.
If you create a route.ts file under [...nextauth], all requests coming into /api/auth will be handled by that route.ts file.
5)만약에 그냥 /auth/route.ts로 파일을 만들면 /callback/github 이 부붙을 처리 할 수 없기 떄문에 404 오류가 발생합니다.
If you simply create a file named /auth/route.ts, a 404 error will occur because it cannot handle the /callback/github path.
📁 로그인 페이지 구현하기
Implementing a Login Page
— app/socialauth/page.tsx
// app/guestbook/page.tsx
//import { auth, signIn, signOut } from "@/auth"
import { auth, signIn, signOut } from "../auth"

export default async function GuestbookPage() {
  // 서버에서 유저 정보 바로 가져오기
  // Get user information directly from the server
  const session = await auth()

  return (
    <div className="p-8">
      <h1 className="text-2xl font-bold mb-4">Social Auth</h1>

      {session?.user ? (
        <div>
          <div className="flex items-center gap-2 mb-4">
            {/* eslint-disable-next-line @next/next/no-img-element */}
            <img src={session.user.image || ""} alt="프로필" className="w-8 h-8 rounded-full" />
            <p>안녕하세요(Hello), <strong>{session.user.name}</strong>님!</p>
          </div>

          {/* Social Auth 작성 폼 위치 / social auth form location   */}
          <textarea className="border p-2 w-full mb-2" placeholder="글을 남겨보세요." />

          {/* 로그아웃 버튼 / logout button*/}
          <form action={async () => {
            'use server';
            await signOut();
          }}>
            <button className="bg-red-500 text-white px-3 py-1 rounded">로그아웃/logout</button>
          </form>
        </div>
      ) : (
        <div>
          <p className="mb-4">글을 작성하려면 로그인이 필요합니다. / You need to be logged in to write a message.</p>
          {/* 로그인 버튼 (서버 액션 활용) */}
          <form action={async () => {
            'use server';
            await signIn("github");
          }}>
            <button className="bg-black text-white px-4 py-2 rounded">GitHub로 로그인 / Sign in with GitHub</button>
          </form>
        </div>
      )}
    </div>
  )
}